Working with Layer Data
Layer Data (ROIs, Annotations, Labels and Heatmaps) of the active image can be saved to a file and imported to other images, or processed in other programs.
Alternatively, the Regions Of Interest (ROIs) can be extracted separately to an .xml
Import Layer Data
Importing layer data, which includes ROIs, labels, measures and annotations, can be done from the file menu or by clicking the + in the Database.
The layerdata file - named layerdata.json - must be imported into the Database on the same level (ie. in the same folder) as the image to which it is associated.
Batch Import Layer Data
-
Click on
 .
. -
Navigate to the folder to import the layer data to.
-
Click on
 and select Layer data to current folder.
 -
Browse the folder containing the layer data and press Select folder.
-
Select Import folder in the newly opened window.
The layer data files must have a file name matching the file name of the image in the study they should be imported to. This ensures that the files will be imported and attached to the appropriate images.
Supported Import Formats
The following file formats are available for layer data import in Visiopharm:
| File Type | Extension |
|---|---|
| Visiopharm Layer Data | .mld |
| Nanostring OME-XML Annotations | .ome.xml |
| Hamamatsu Annotations | .ndpa |
| Pathcore Sedeen Session | .session.xml |
| Leica/Aperio Annotations | .xml |
| India Labs Annotations | .annotations |
| Aiforia Annotations | .json |
| TIFF Image | .tif .tiff |
| 10x Genomics Scanning Spots | .csv |
| 10x Genomics Boundaries | .csv.gz |
| Aiforia GeoJSON | .geojson |
| QuPath GeoJSON | .geojson |
| Visiopharm ROI Annotations XML | .xml |
Each file format is different in terms of what it is capable of importing (ROIs, Labels, Annotations).
Import of whole slide 32-bit integer value TIFFs
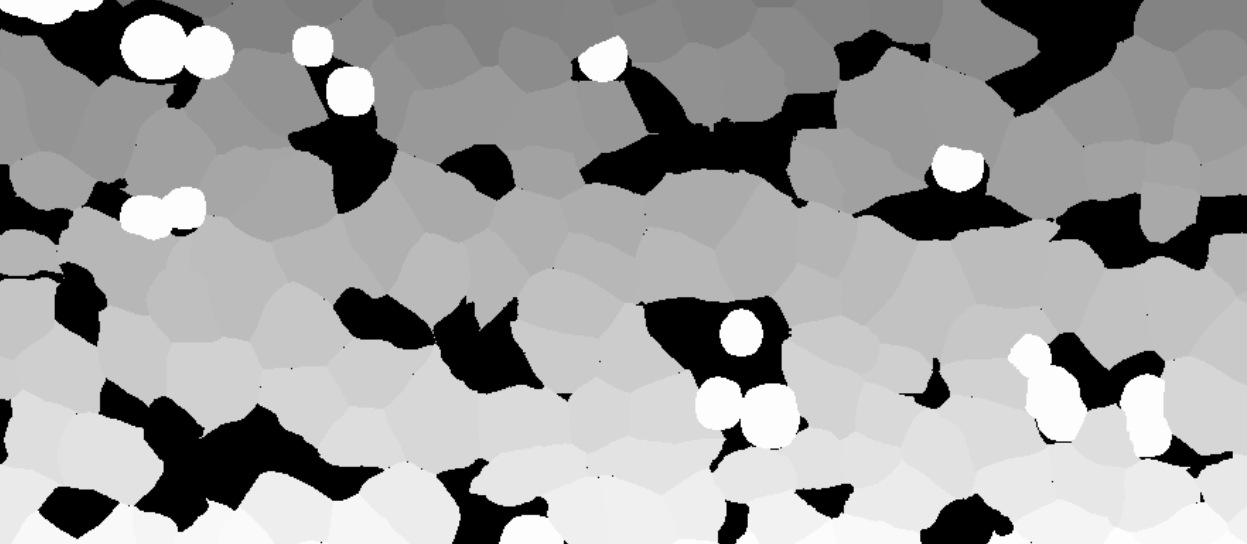
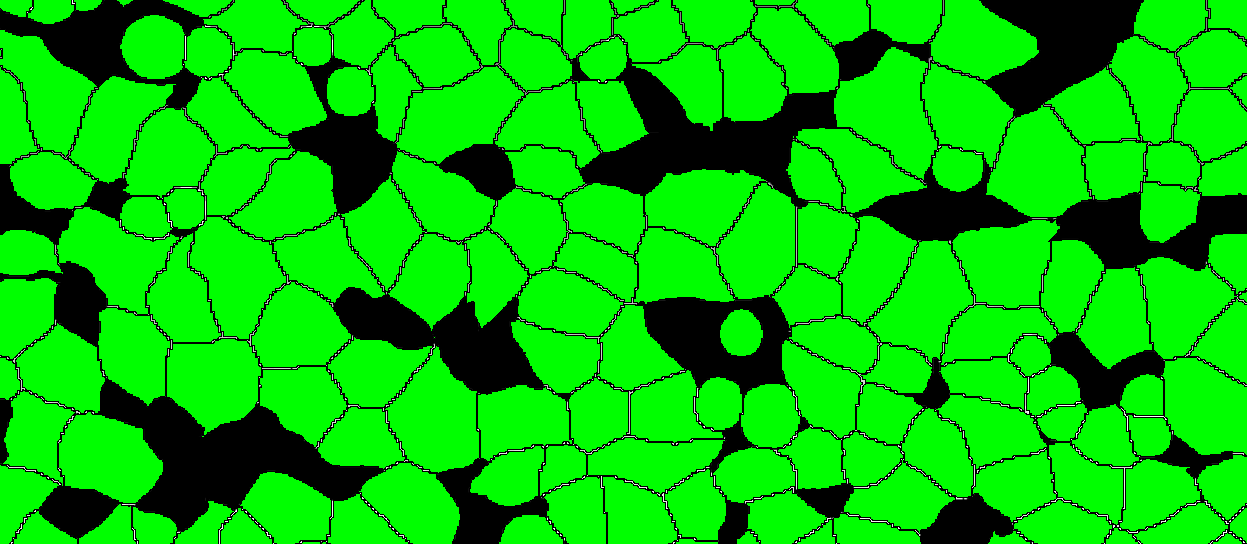
It is possible to import whole slide 32-bit TIFFs with segmentation or annotation data, and convert the objects into Visiopharm Labels, using the Label Crop format. This is neccesary when the TIFF image comes with 32-bit integer values (intensity levels) with uniquely IDed objects. When importing using the Label Crop format, all objects in the imported TIFF file will be converted to overlay Labels of type 1, and objects are split with NN4 (Nearest neighbour) connectivity. 0 intensity will give no Label.
Skip Pixel Consistency Validation
When importing a .geojson layer data, it is possible to toggle 'Skip Pixel Consistency Validation' in the 'Assign Imported Annotation' window.
This option will make sure that Labels/ROIs are mutually exclusive polygons, making it clearer what a point is specifically under multiple polygons of different types.
Export Layer Data
-
Click on
or on  .
. -
Navigate to and select the image with the layer data to export.
-
Click File
 → Export
  → Layer Data
  to start the export process.
 -
Browse to the location where the file should be saved and give it an appropriate name. Select the export type and click Save to export the layer data in the selected format.
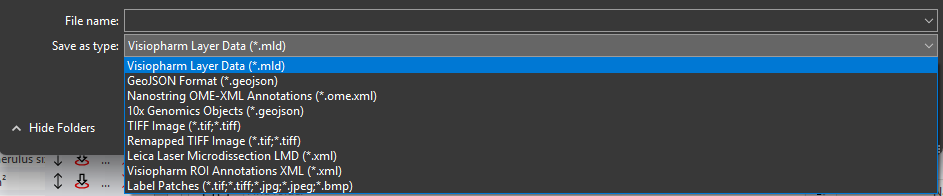
Supported Export Formats
The following file formats are available for export in Visiopharm:
| File Type | Description | Extension |
|---|---|---|
| Visiopharm Layer Data | Contains data layers created in Visiopharm for analysis or visualization. | .mld |
| GeoJSON format | Export labels in geojson format compatible with Xenium Eplorer software. | .geojson |
| Nanostring OME-XML Annotations | Exported annotations in XML format compatible with Nanostring OME analysis workflows. | .ome.xml |
| 10x Genomics Objects | Exports label objects for further analysis in Xenium Explorer. | .geojson |
| TIFF image | High-resolution image format commonly used in microscopy and imaging software. | .tif .tiff |
| Remapped TIFF image | Used to save overlays in the reference frame of a linked Tissuealign image. It will create the same output as TIFF in a single image. | .tif .tiff |
| Leica Laser Microdissection LMD | Exported ROI annotations in XML format compatible with Leica LMD software. | .xml |
| Visiopharm ROI Annotations XML | Region of interest annotations exported as XML files for integration with other systems. | .xml |
| Label Crops | Used for import of whole slide 32-bit TIFFs with segmentation or annotation data, and convert the objects into Visiopharm Labels. Used when the TIFF image comes with 32-bit integer values (intensity levels) with uniquely IDed objects. All objects in the imported TIFF file will be converted to overlay Labels of type 1, and objects are split with NN4 connectivity. 0 intensity will give no Label. | .tif .tiff |
| Label Patches | Exports one image patch and one mask patch per label object. | .tif .tiff .jpg .jpeg .bmp |
GeoJSON for 10X Genomics Xenium Export
Labels created in the Visiopharm software can be exported in the .geojson format for further analysis in Xenium Explorer. Please see https://www.10xgenomics.com/support/software/xenium-ranger/latest/analysis/running-pipelines/XR-import-segmentation for more details.
Only label objects are exported and non-solid labels (that is, those with any holes) will be excluded upon import. For each label object, an Object ID is written both to the GeoJSON file and the "Object Info" output variable which allows correlation of the Visiopharm and Xenium objects after import.
Remapped TIFF image Export
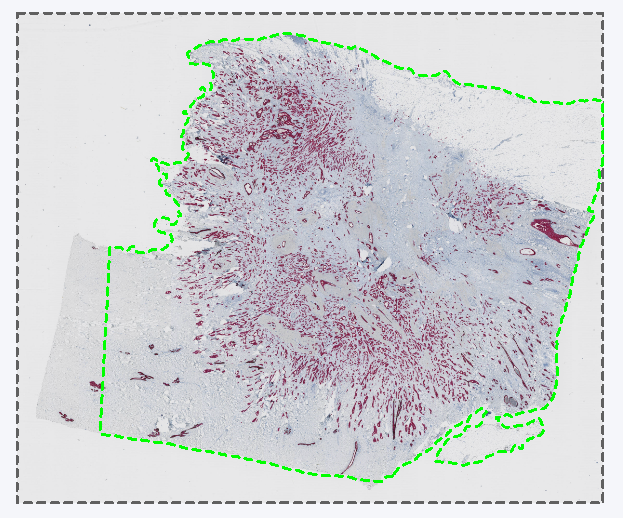
The Remapped TIFF image format is used to save overlays in the reference frame of a linked Tissuealign image. It will create the same output as TIF in a single image. Tissuealign workflows are detailed in the section Tissuealign. One usage is exemplified in the following analysis where a slide is scanned over two points in time, and each scan is slightly misaligned due to being moved in and out of the scanner. The analysis has been made on a reference slide denoted Section 1, resulting in an ROI around the tissue. If this is exported as layer data in a standard TIFF image format. When importing the layer data from Section 1 onto a later scan of the same slide, denoted Section 2, the layer data is misaligned due to the misalignment between the Section 1 and Section 2 scans.
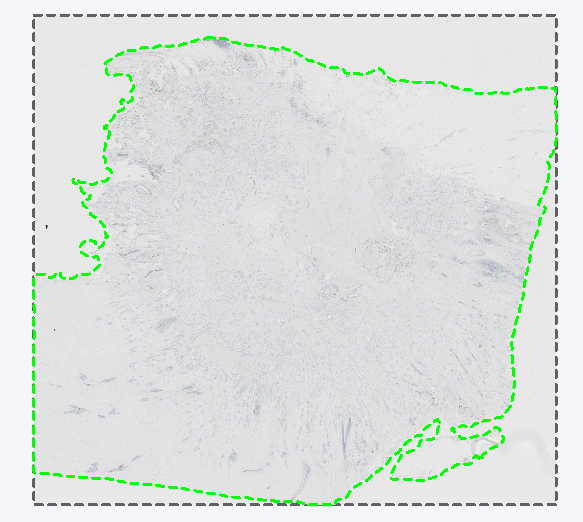
Section 1 with a ROI around the tissue exported as layer data in TIFF format.
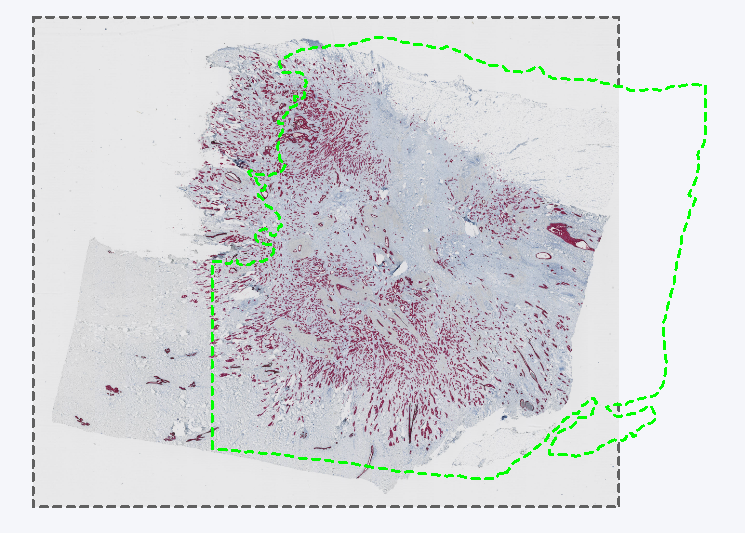
Section 2 with the misaligned layer data from the Section 1 slide.
In such cases one would go through a Tissuealign workflow, or potentially merely auto align the Section 1 and Section 2 scans, to align the layer data and continue with the analysis on the Section 2 scan.
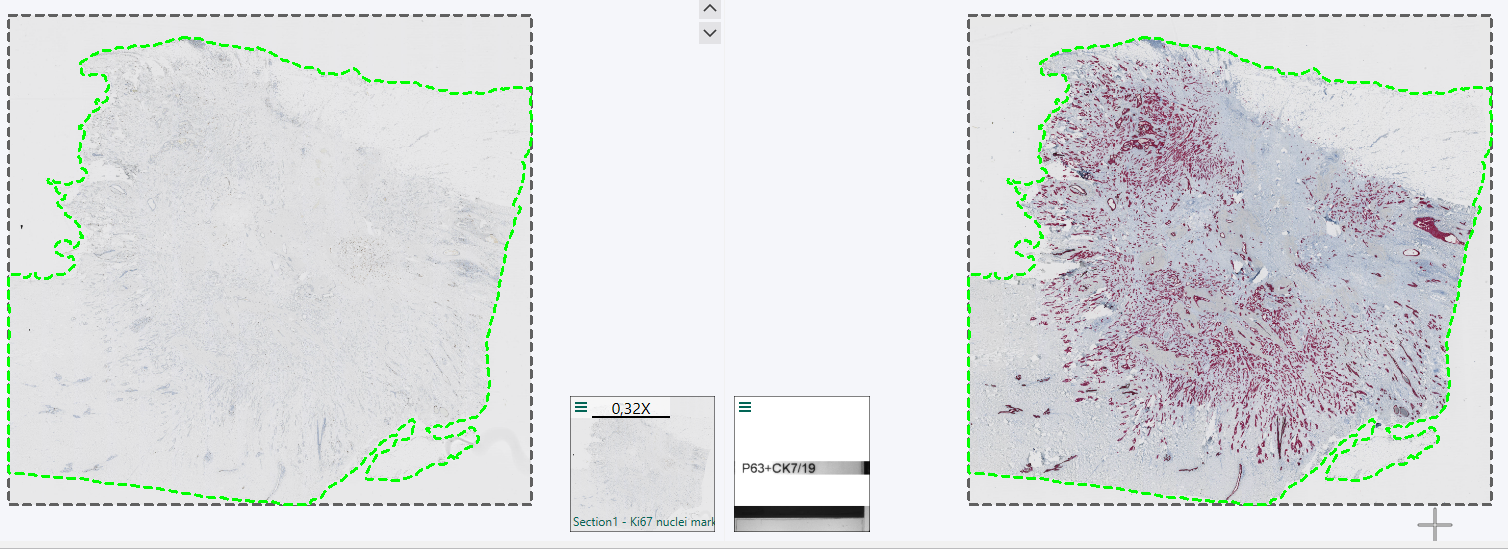
Once the analysis on the aligned Section 2 scan is finalised, and the resulting ROIs, Labels, Heatmaps etc. needs to be exported as layer data, they need to be exported in the Remapped TIFF image Format in order to be aligned with the Section 2 slide. When selecting the Remapped TIFF format after tissue alignment you will be asked which slide the layer data should be aligned to. Here, Section 2 is picked, to remap the ROI layer data from being aligned with Section 1 to Section 2.
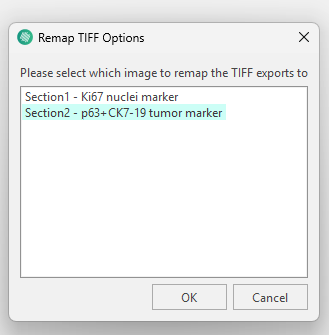
When selecting remapped you will be asked to pick which image to remap on to.
The resulting layer data aligned with the section 2 scan.
Be aware that using the Remapped TIFF format might cause merging issues.
Leica Laser Microdisector (LMD) XML Export
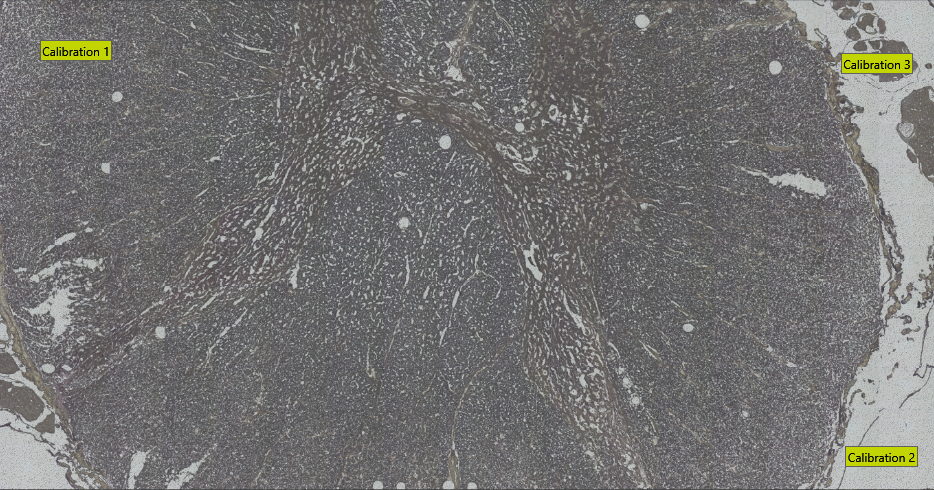
To export Visiopharm ROIs in Leica LMD XML format, ensure you have at least three calibration points. These can be specified by using Visiopharm Text Annotations placed in three well-distributed and easily recognizable image locations. Have the text for the calibration spots being Calibration 1, Calibration 2, ..., as shown in the example image below.
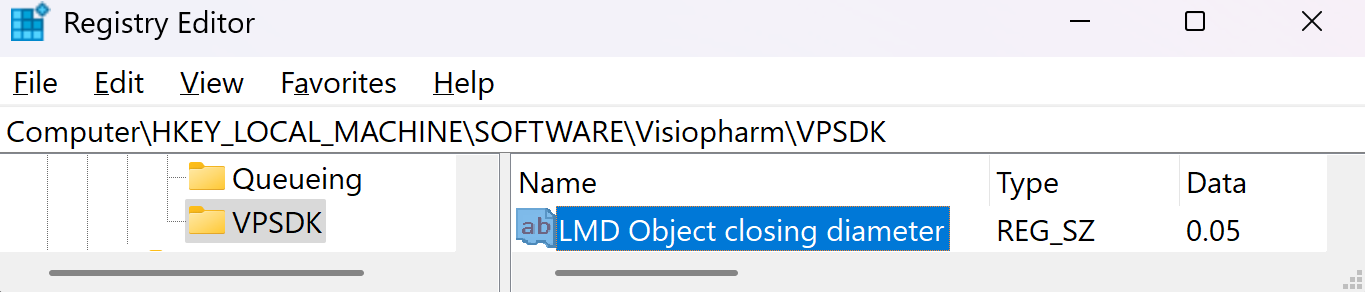
The export will save all non-clear ROI objects on the overlay after performing a morphological closing, followed by a simplification using one-fifth of the closing diameter. The default closing diameter is 50 μm. This can be adjusted in Registry Editor under Computer\HKEY_LOCAL_MACHINE\SOFTWARE\Visiopharm\VPSDK as shown below.
To see which object was written to the LMD xml pass the LMD objects back as annotations to the Visiopharm overlay by enabling the option Pass Back LMD Objects in Registry Editor under Computer\HKEY_LOCAL_MACHINE\SOFTWARE\Visiopharm\VPSDK.

Label Patches Export
In many cases, label patches created in Visiopharm may be exported for use in other deep learning pipelines outside of Visiopharm, for example for additional training or inference. This can be done using the Label Patches export option
The Label Patches export is accessed via File ![]() → Export
→ Export ![]() → Layer Data
→ Layer Data ![]() .
Under Save as type, select Label Patches. This opens the Export label patches dialog, where the output configuration can be defined.
.
Under Save as type, select Label Patches. This opens the Export label patches dialog, where the output configuration can be defined.
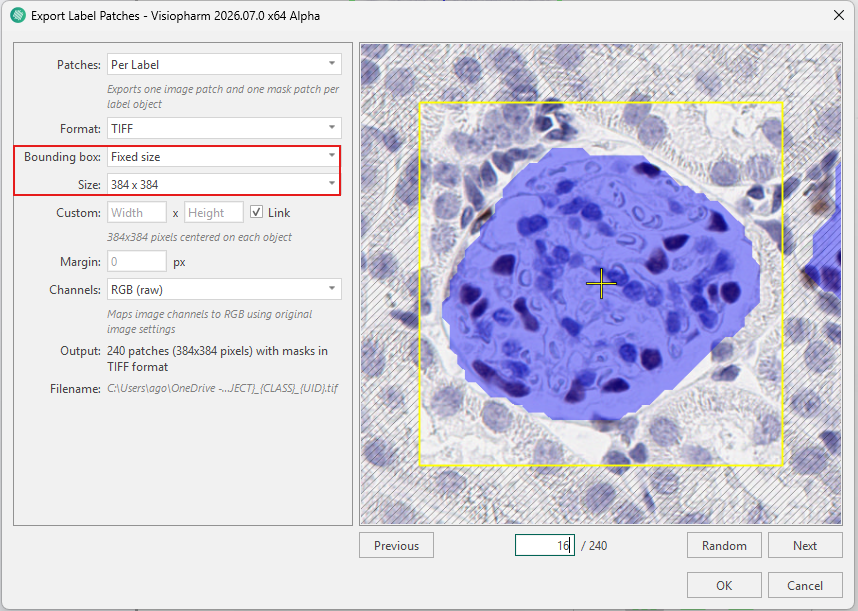
When exporting label patches, two primary bounding box strategies are available: Fixed size and Fit to object.
When using Fixed size, each label patch is exported using a bounding box of fixed dimensions, as specified under Size. This approach preserves the original scale of the objects across all patches. However, it requires that the specified bounding box size is sufficiently large to contain each object. If the bounding box is too small, parts of some objects may be cropped.
Below is an example where glomeruli labels are exported using a fixed size of 384×384. Although the bounding box is large enough to encompass the object shown in the image, traversing through the label patches via the Previous, Next, and Random buttons reveals that several glomeruli labels are too large to be encompassed by the box and would therefore be cropped when exported.
When using Fit to object, the problem of cropping objects is eliminated, as the bounding box is fitted tightly around each individual object. The bounding box is then expanded to match the specified output aspect ratio and resampled to the specified size (384×384). This approach ensures that no objects are cropped, even if they vary in size. However, because each object is rescaled to the same output dimensions, the original scale of the objects is not preserved.
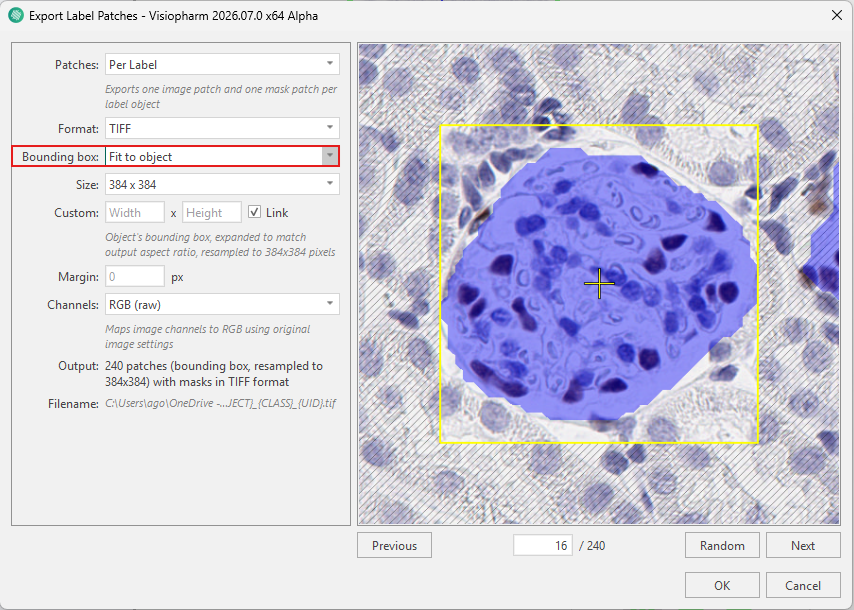
Both methods require selecting an appropriate Size, which is set to 256×256 by default. In addition to bounding box selection, further configuration options are available under Patches, output format, custom, margin, and channel, as described in the Export label patches dialog.