Getting started
Here we cover how to create a Deep Learning APP, how to train a Deep Learning Classifier, understanding features in repspect to Deep Learning, as well as how to use Tensorboard.
Create a Deep Learning APP - Step by step guide
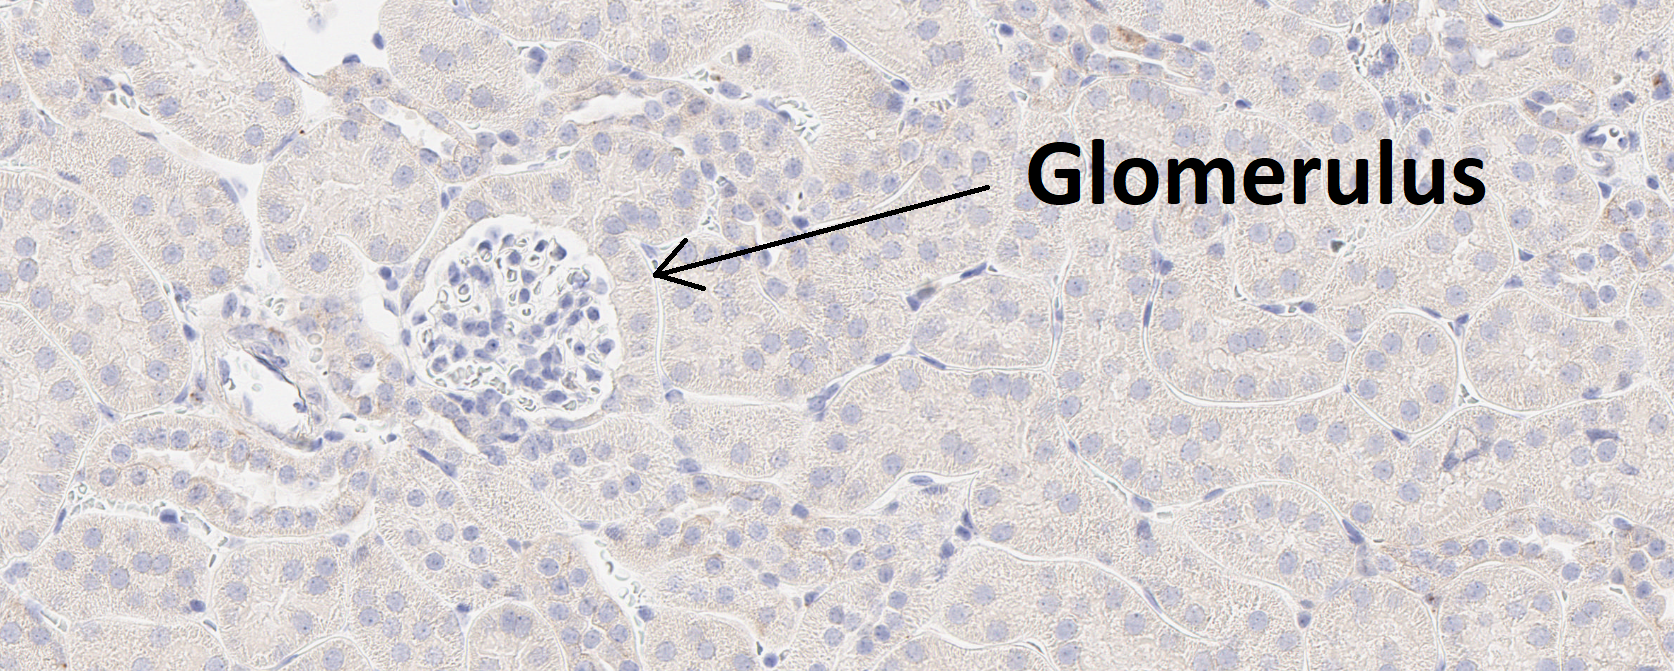
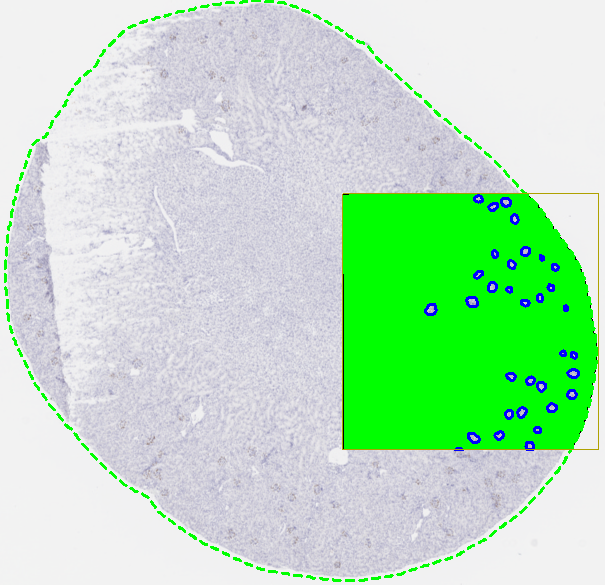
This guide provides a simple entry point for creating a deep learning app. The goal is to build an APP that can automatically detect glomeruli, which are small structures in the kidney, as shown in the image below.
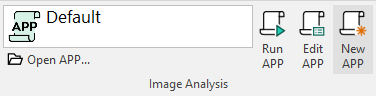
- Create a new APP by pressing the New APP button in the Image Analysis section in the ribbon.
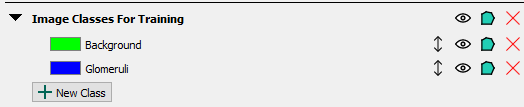
- Create an image class in the Image Classes for Training section for each image structure of interest, as well as a background class. When using ROIs for training, the background class must be placed at the top of the image class list. In this example, we aim to detect a single image structure, glomeruli, and therefore define two image classes in total, including the background class.
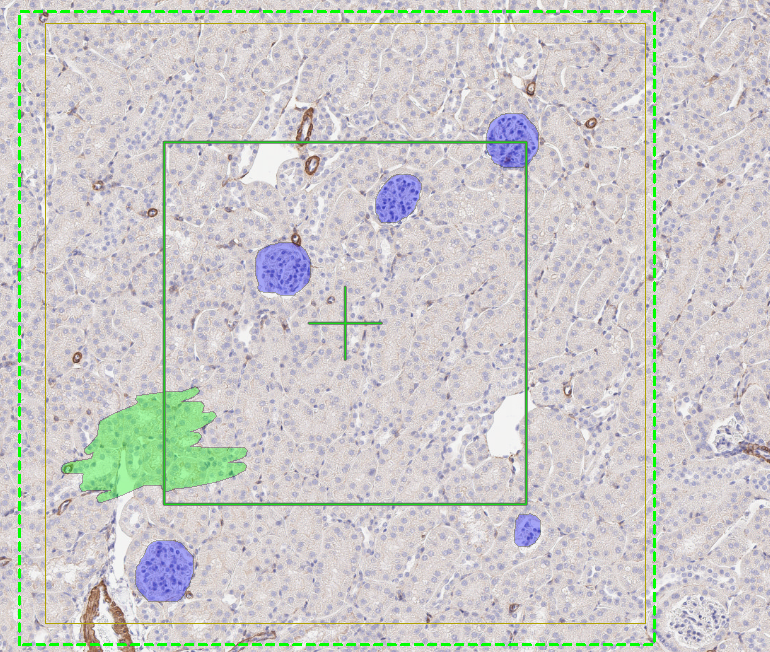
- Draw training labels on all instances of the image structure of interest (in this case, glomeruli) across the entire training slide(s). This requires that every glomerulus is labeled, and that at least one example of the background class is included. If Regions of Interest (ROIs) are drawn on the slide, all pixels within each ROI will be used for training. Pixels inside an ROI that are not explicitly labeled are assumed to belong to the first training label, which in this case is Background. To guide the sampling process correctly, at least one explicit example of the background class must be provided by drawing a background training label.
In some cases, such as tumour-stroma classification, a background class may not be meaningful. In these situations, it is recommended that the first class in the image class list represents the largest class, which is often stroma. This approach is generally easier, as it requires labeling instances of tumour and providing at least one example of stroma. All unlabeled pixels will then be automatically classified as stroma.
When drawing ROIs around training labels, keep the following guiding principles in mind:
- Drawing ROIs that are too small can reduce the dataset size and cause the model to overfit, leading to incorrect predictions.
- Avoid drawing ROIs that cut through an object, as this teaches the algorithm that the object should be split.
- Do not draw labels outside ROIs, as this can interfere with the training process.
- If possible, square ROIs often result in more effective training; however, any ROI shape that follows the above principles works.
If ROIs are not drawn on the slide, only pixels with training labels are used for training. This approach can be useful when it is not feasible to label all objects of interest, and you want to avoid automatically classifying all unlabeled pixels as background. In such cases, some unlabeled pixels may still belong to the object of interest but remain intentionally unclassified.
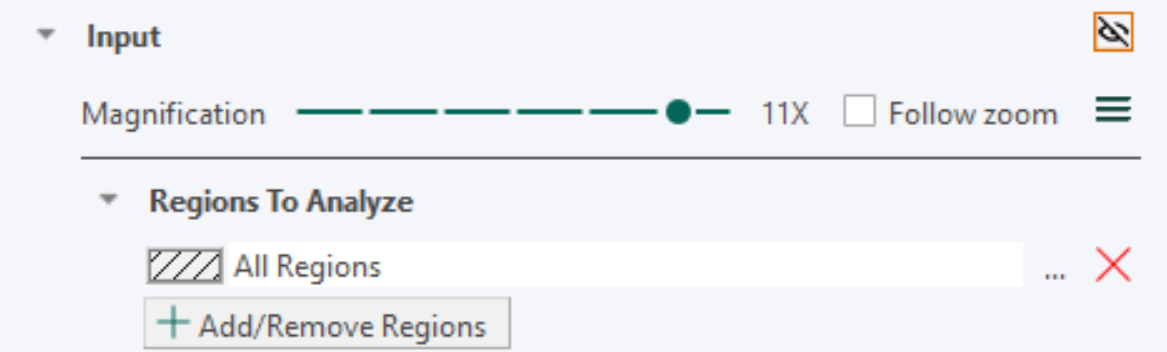
- Set up the Input section with the desired magnification. A high magnification means that fine details in the image are visible to the app, while a low magnification means that only large-scale details are visible. The lower the magnification, the faster the training. Therefore, the magnification level should be chosen as low as possible while ensuring that the objects of interest are still visible.
-
Under the Classification -> Method, select Deep Learning as the classifier. Leave the settings at the default settings (U-Net (Default), Probability= 0%)
-
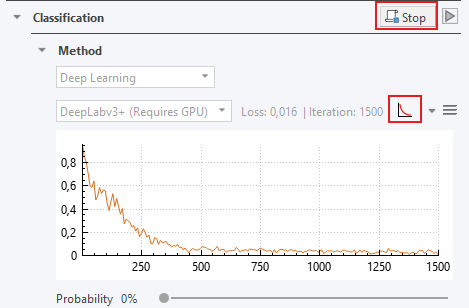
Press the train button
 to start training the APP. After a short delay, the error rate shown to the right of the network architecture name will fluctuate and decrease.
 -
While the APP is training, you can click on the training plot icon
 if the convergence graph is not visualized. When the training seems to have converged, you can stop the training by clicking the stop button
  .
.
-
Save the APP in order to save the APP together with the trained neural network by pressing the save button
 , at the top of the APP Author dialog.
 -
Preview. Previewing the APP classifies the current field of view (FOV). Click the Preview button
 under Classification to view and assess the neural network output.
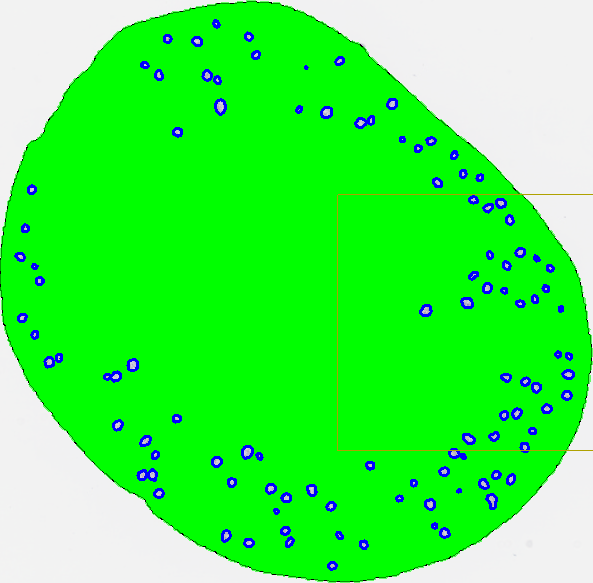
- Run the APP. When training is satisfactory (e.g., The preview looks good) run the APP to classify the entire slide by clicking
 .
.
After training, classification results will often still contain minor misclassifications or require refinement. While post-processing is not strictly required, it is commonly used in full analysis workflows to improve results. Typical post-processing operations include morphological steps such as erosion, dilation, and hole filling. Post-processing steps can also be used to adapt the output for further analysis, for example by converting classified objects into ROIs or clearing the background label. For details on available post-processing operations, see the Post Processing section.
For information on creating output variables for further analysis (e.g. counting classified glomeruli), see the Output Variables section.
Training a Deep Learning Classifier
Before starting the training process of the classifier, ensure that the following conditions are met:
- Each type of object you want to detect in the image has a corresponding image class defined in the Image Classes for Training section of the APP Author.
- Each training slide or image contains one or more training ROIs, and no labels are drawn outside of these ROIs.
- Every object of interest present within the training ROI(s) is labeled with its corresponding image class.
- The topmost class in the Image Classes for Training list in the APP Author is the class that all unlabeled pixels should be assigned to, typically the background class.
- Every image class in the image class list is represented at least once somewhere in the training set. All classes do not need to be present in every ROI; however, each class must appear in at least one ROI.
Setup Image classes for training. All image classes (labels) that you want the Deep Learning classifier to detect need to be specified in the Image Classes for Training section in the APP Author dialog. A background class needs to be added as well and should always be on the top of the list of the classes in the Image Classes for Training section. The reasoning behind is that the Deep Leaning classifier assumes the first element in the Image Classes for Training is the "background" class. For example, if you want to create a Deep Learning classifier which can detect Ki-67-positive and Ki-67-negative nuclei in a Ki-67 IHC slide, you will need a total of three image classes, e.g., Background, Positive nucleus, Negative nucleus. Adding an additional image class to an APP after the network has been trained will result in the deletion of the training results and requires a retraining of the APP. Make sure to always save your APP during training and before making any changes.
Draw training labels. The optimal way to setup training labels to train a Deep Learning network is by using training ROIs in images. Start selecting an area(s) in the image(s) you want to use for training and draw ROI(s). Now, draw training labels corresponding to your Image Classes for Training inside the ROI(s). Make sure to label every class carefully within the training ROI(s) which doesn't belong to the background class, because the algorithm assumes that every unlabeled pixel belongs to the background image class. Otherwise, the training algorithm may receive cases of an image class (e.g., glomeruli, nucleus, or necrosis) wrongly labeled as the background class, which causes the network to segment image structures of interest as the background class. It is still required to have one background label in the image(s) to start the training. We recommend including one small example of background label in each training ROI. To train a well performing Deep Learning classifier, it is important to include the variability of the image classes by adding multiple training ROIs and labels. As rule-of-thumb, start with at least 2-4 squared training ROIs at the size of the FOV per image. Note that the number of training ROIs needed for a sufficient training result is strongly dependent on the inherited tissue variation the Deep Learning network needs to learn. Ensure that no training labels are drawn outside the ROIs, as this will result in these labels being masked as in the Masking preproccesing step, and then being used for training, which might result in incorrect training.
Training labels without ROIs. The Deep Learning classifier can also be trained using training labels without drawing training ROIs. Be aware that this way of labeling is generally not recommended as this will lead to a lack of contextual information during the Deep Learning training. Labeling without training ROIs cause the Deep Learning classifier to ignore the unlabeled pixels during the training
Start / Stop Training Process. The training process of a deep neural network is an iterative process optimizing an extreme number of parameters. The training process is started by pressing the Train button in the APP Author dialog . The training process may run for a very long time while the Deep Learning classifier becomes better and better. The process can be stopped at any time by pressing the Stop button and can be continued by pressing the Train button again, which thereby allows continuing the training with additional training data. During the training, the current loss value can be seen directly in the loss field and on the convergence graph, which shows the loss value (y-axis) by the number of iterations (x-axis). Do not zoom in/out on the image while training, it will stop the process. The training can be stopped when the loss graph has converged i.e., when the loss value becomes stable for several iterations. We recommend that you pause the training regularly and preview the APP to get a feel for its progression.
To train on several images use Ctrl+Click to select all the images you wish to train on and select "Train" or "Continue train" under classification.
Features from Deep Learning
After training a Deep Learning classifier, a feature for each defined image class will appear under the Features subsection in the Classification section. Each feature represents the probability that a pixel belongs to the corresponding image class, and the sum of all feature values (probabilities) thus sum to one for each pixel. These features are the result of the Deep Neural Network. The Deep Learning classifier uses these features, resulting from the deep neural network, to classify each pixel to the class having the highest probability.
If you want to preview any of the features, click the eye icon to the right of the feature, and the feature will be previewed in the current field-of-view. This will make the deep neural network compute that feature.
It is possible to add filters to the features, as with any other features, however, keep in mind that the probabilities thereby will no longer sum to one. For the advanced users, it is also possible to choose another classifier after training your network. The features are still computed from deep neural network (which is saved with the APP), and then e.g. an Threshold classifier could be used to perform the actual classification.
While previewing a feature, you can hover the mouse pointer over a pixel in the field-of-view to see the exact probability value.
Tensorboard Integration
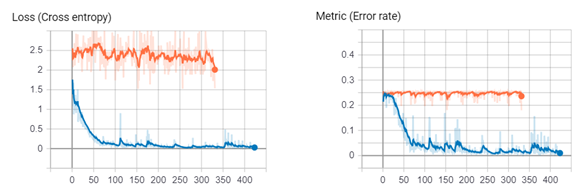
Tensorboard is an alternative to the simple training plot used to inspect the training progress of your deep neural network. Here, you can see both metric (error rate) and loss function curves, which is the underlying function that is used in the training. It will save the session, so you can compare training curves, and e.g. use it to guide adjustment of the learning rate.
An example of the loss- and metric (error rate) function curves of two sessions in Tensorboard have been visualized below, showing the training progress of two separate deep neural networks.
If you're experiencing issues with TensorBoard, contact support@visiopharm.com
Opening Tensorboard
- Click Open Tensorboard from the dropdown menu. This will start Tensorboard and open the client in your default browser.
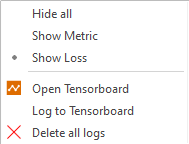
- Click Scalars in the ribbon of Tensorboard to view your training curves (e.g. Loss function and Metric (error rate)). If the Scalars page is not available, please make sure that a training is running.
- Click Graphs in the ribbon of Tensorboard to view how the selected neural network is designed. Here, you can also see the difference between the available network architectures (ref: to network section).