Export data
-
Click on
 .
. -
Navigate to the right folder in the navigation area or an entry in the data manager.
-
Right-clickon the folder(s)/entry/entries -
Select Export.
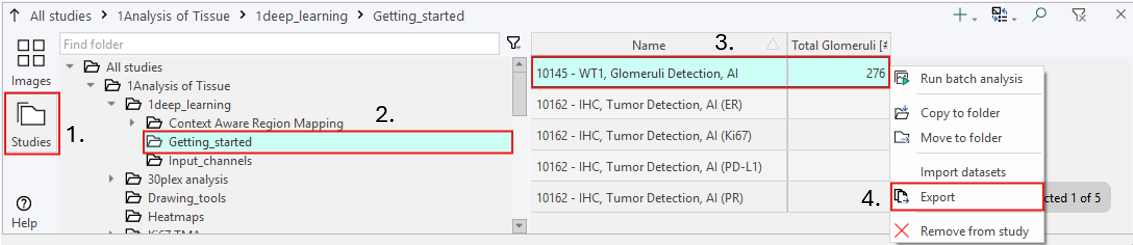
Below is a simple example showcasing how to export the glomeruli detection data on a single tissue slide after running a glomeruli detection app.
To export data from several slides at once, use Ctrl + Click to select the desired slides, then right-click and choose Export.
To export an entire folder, right-click on the selected folder (step 2) and select Export from there.
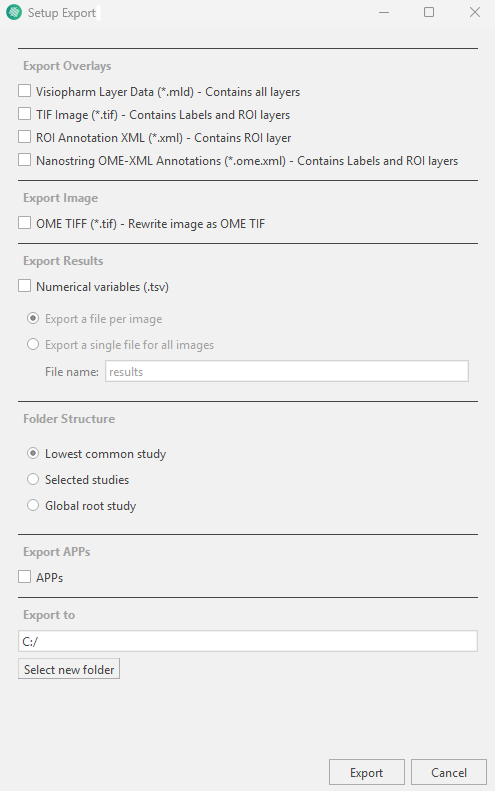
Once clicking Export the following options are available:
| Option | Description |
|---|---|
| Export Overlays | Exports the overlays for the selected entry/entries. Depending on the chosen file format, it is possible to select all layers, solely labels and ROIs, or solely ROI layers. |
| Export Image | Exports each selected entry/entries as an OME TIFF (*.tif) in the export location regardless of original image format |
| Export Results | Determine whether numerical values are exported by toggling Numerical Variables (.tsv), and, if so, whether they are exported as a file per image or as a single file for all images. |
| Folder Structure | At which level the folder structure is considered. See example below. |
| Export APPs | Exports the APPs for the selected entry/entries. |
| Export to | Location of the exported data. |
- Once the settings have been configured, click Export in the bottom right corner to export the data.
Folder Structure
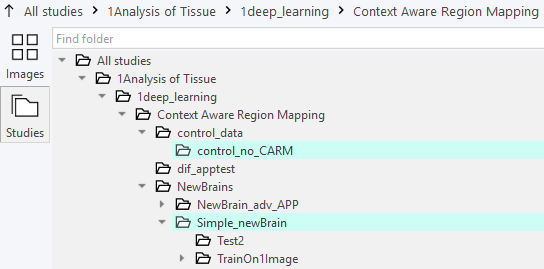
The difference between the three folder structures is best illustrated with an example. Below, two subfolders are highlighted, and data from the slides within these folders are to be exported.
The first dataset is located under: 1Analysis of Tissue → 1deep_learning → Context Aware Region Mapping → control_data → control_no_CARM
The second dataset is located under: 1Analysis of Tissue → 1deep_learning → Context Aware Region Mapping → NewBrains → Simple_newBrain
Selecting lowest common study will create a folder structure starting from the lowest shared folder.
Context Aware Region Mapping
├── control_data
│   └── control_no_CARM
│       └── Exported_Data
└── NewBrains
    └── Simple_newBrain
        └── Exported_Data
Selecting selected studies will create a folder structure that include only the folders where the data is stored.
control_no_CARM
└── Exported_Data

Simple_newBrain
└── Exported_Data
Selecting global root study will create a folder structure starting from the highest-level root folder, including all intermediate folders down to where the data originates.
1Analysis of Tissue
    └── 1deep_learning
                └── Context Aware Region Mapping
                        ├── control_data
                        │       └── control_no_CARM
                        │               └── Exported_Data
                        └── NewBrains
                                └── Simple_newBrain
                                        └── Exported_Data
Leica Laser Microdisector (LMD) XML Export
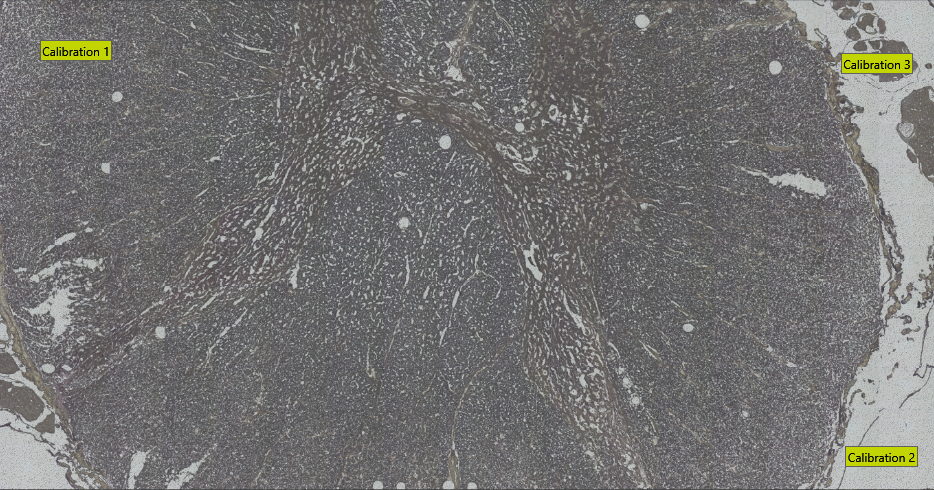
To export Visiopharm ROIs in Leica LMD XML format, ensure you have at least three calibration points. These you specify by using Visiopharm Text Annotations placed in three well-distributed and easily recognizable image locations. Have the text for the calibration spots being Calibration 1, Calibration 2, ..., as shown in the example image below.
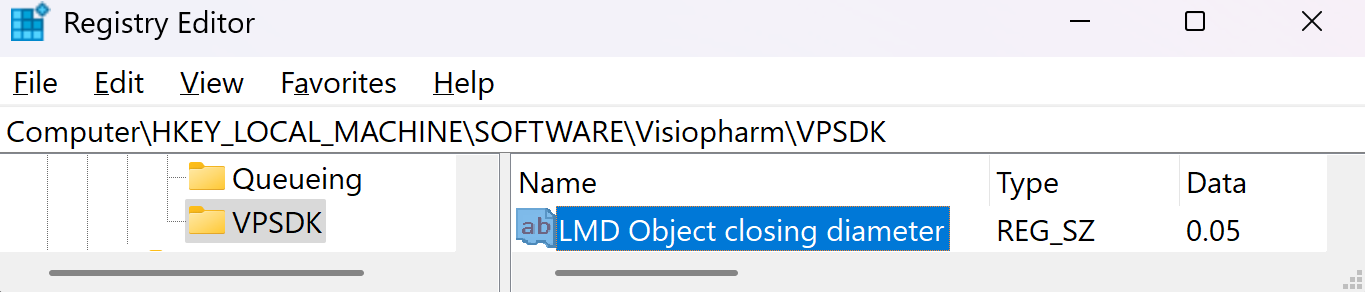
The export will save all non-clear ROI objects on the overlay after performing a morphological closing, followed by a simplification using one-fifth of the closing diameter. The default closing diameter is 50 μm, but this can be adjusted in Registry Editor under `HKEY_LOCAL_MACHINE\SOFTWARE\Visiopharm\VPSDK' as shown below.
To see which object was written to the LMD xml you can pass those back as annotations to the Visiopharm overlay by enabling the option Pass Back LMD Objects in Registry Editor under HKEY_LOCAL_MACHINE\SOFTWARE\Visiopharm\VPSDK.
