Supported image formats
The following image formats are supported in Visiopharm:
| File type | Description | Extension | Supported in 32-bit | Supported in 64-bit |
|---|---|---|---|---|
| 10X Genomics Visium | Spatially resolved transcriptomic data captured using 10X Genomics' Visium technology. | *.h5, *.csv | No | Yes |
| Akoya | Component Images | *.component_data.tif | Yes | Yes |
| Akoya | qptiff Virtual Slide Format | *.tif, *.qptiff | Yes | Yes |
| Aperio | Fused Images Format | *.afi | Yes | Yes |
| Aperio | Scanscope Virtual Slides Format | *.svs | Yes | Yes |
| AVI | Resource Interchange File Format | *.avi | Yes | Yes |
| Bacus | Web slide Format | Finalscan.ini | Yes | Yes |
| BMP | Microsoft Windows Bitmap | *.bmp, *.b | Yes | Yes |
| CarlZeiss | CZI Image Format | *.czi | Yes | Yes |
| Hamamatsu | NDP.Image Set Files | *.ndpis | Yes | Yes |
| Hamamatsu | NPD.Image Files | *.ndpi, *.ndpr, *.vmu, *.vms | Yes | Yes |
| HIPS | Human Information Processing | *.hip, *.hips | Yes | Yes |
| Innopsys | Virtual Slide Format | *.tif | Yes | Yes |
| JPEG | Jpeg File Interchange Format | *.jpg, *.jfif, *.jif | Yes | Yes |
| JPEG 2000 | JPEG 2000 File Format | *.jp2 | Yes | No |
| KFBio | KFBio high-resolution whole slide images | *.kfb, *.kfbf | No | Yes |
| LEI | Leica Lei Image Series | *.lei | Yes | Yes |
| Leica SCN | SCN Virtual Slides Format | *.scn | Yes | Yes |
| LSM | Zeiss LSM File Format | *.lsm | Yes | Yes |
| MCD | Fluidigm Tiled Images | *.mcd | Yes | Yes |
| MetaSystems | VSI Image Files | *.vsi | Yes | No |
| Motic | MDS File Format | *.mds | Yes | No |
| Nanostring OME | XML-based metadata format, on OME standards. | *.ome.xml | No | Yes |
| Nikon | Nd2 Image Files | *.nd2 | Yes | Yes |
| OMETIFF | Open Microscopy Enviroment Tag Image File Format | *.ome.tif, *.ome.tiff | Yes | Yes |
| Olympus | OIR Image Files | *.oir | Yes | Yes |
| Olympus | VSI Image Format | *.vsi | Yes | Yes |
| Olympus | WSI Image Format | *.ovs | Yes | No |
| Phillips | Phillips TIFF Virtual Slide Format | *.ptif, *.tif, *.tiff | Yes | Yes |
| Phillips | Phillips iSyntax Image Format | *.iSyntax, *.i2Syntax | No | Yes |
| SF | Simple File Format | *.sfh | Yes | Yes |
| SIFF | Stratec Image File Format | *.M** | Yes | Yes |
| SPFF | Stratec Projection File Format | *.M** | Yes | Yes |
| Spectrum | Spectrum eSlideManager | *.sis | Yes | No |
| TGA | Targa Graphics Adapter | *.tga, *.vda, *.icb, *.vst | Yes | Yes |
| TIFF | Tag Image File Format | *.tif, *.tiff, *.gtif | Yes | Yes |
| Ventana | Ventana Virtual Slides Format | *.bif, *.tif | Yes | Yes |
| Visiopharm | Whole Slide Set | *.wss | Yes | Yes |
| VIV | Varian VIV | *.viv | Yes | Yes |
| Winmedic | ZYP File Format | *.zyp | Yes | No |
| ZVI | Zeiss Vision Image | *.zvi | Yes | Yes |
Ventana has discontinued support for HT and Coreo scanners, and Visiopharm is prohibited from loading their images correctly. Please reach out to Ventana or use a Visiopharm 32-bit version 2023.09 or earlier to convert the images into normal BigTiffs
Import DICOMweb images
To import DICOMweb images, click on the ![]() icon and select Import DICOMweb images.
icon and select Import DICOMweb images.
In the shown dialog, type in the DICOMweb url, and select the study to import.
Then specify where to save the images in the database.
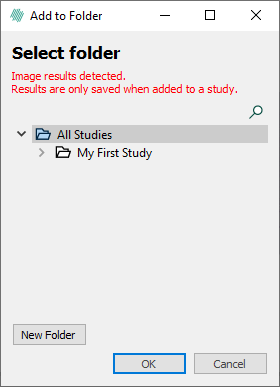
Whereafter will all images for all selected studies in that folder.
Stitch together Leica Laser Dissector BMP to one whole slide
It is possible to stitch together a Leica Laser Dissector BMP to one whole slide. This can be done if a folder contains multiple FOV images (BMP, JPG, ...) with the same name except for the number at the end. Here is an example of such a folder structure:
Folder
├── Image_1.bmp
├── Image_2.bmp
├── Image_3.bmp
├── Image_4.bmp
├── Image_5.bmp
└── Image_6.bmp
To do this, place a file called VPSDKMetaData.xml in the folder with the images. The file should contain the following:
<?xml version="1.0" encoding="utf-8"?>
<VPSDKMetaData version="1.0">
    <DPmmX>2001.100</DPmmX>
    <DPmmY>2001.300</DPmmY>
    <ImageFolderStitching>
        <ImagesPerRow>17</ImagesPerRow>
        <ColumnGaps>10</ColumnGaps>
        <RowGaps>20</RowGaps>
    </ImageFolderStitching>
</VPSDKMetaData>
The values in the file should be adjusted to match the actual values of the images. The values in the example above are just placeholders.
Converting images using ImageToTiff
ImageToTiff is a tool used to convert an image from one image format to TIFF(Tagged Image File Format). This section is a guide to ImageToTiff when converting any Visiopharm-supported file into an OME TIFF.
The file is installed into the Visiopharm "Program Files" directory in versions 2023.01 and later. Users need to have basic familiarity with Windows Powershell.
By default the file is located at C:\Program Files\Visiopharm.
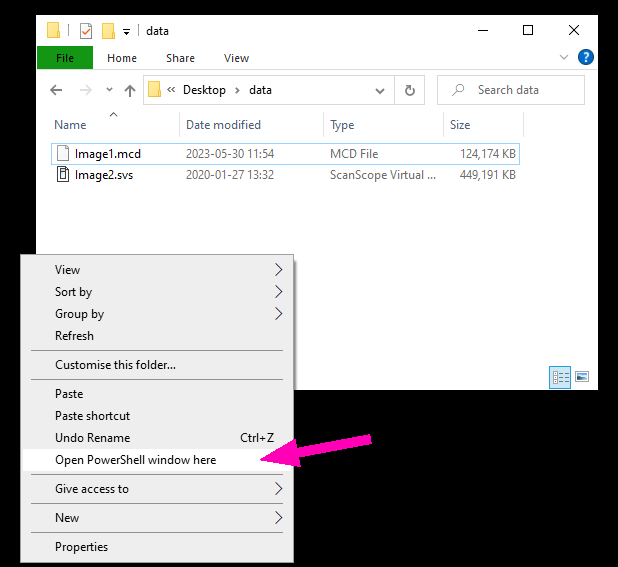
To open Windows PowerShell in Windows 10, navigate to the image directory and right-click while holding Shift. Select "Open PowerShell window here".
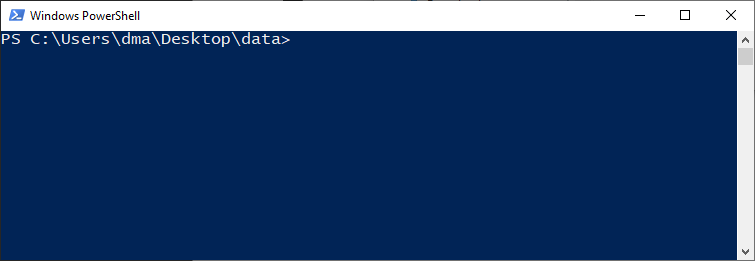
Now the Powershell window should look like this:
To convert a file from its original format into OME.TIFF type the following command and hit ENTER.
& "C:\Program Files\Visiopharm\ImageToTIFF.exe Image1.mcd"
TAB completion can be used to reduce the amount of typing required. To replicate the previous command, type the following. Note that brackets indicate keypresses:
c:\pro [TAB] [TAB] vis [TAB] im [TAB] [TAB] [TAB] [SPACE] im [TAB] [ENTER]
When the conversion is complete, a prompt will appear asking where to save the resulting image.
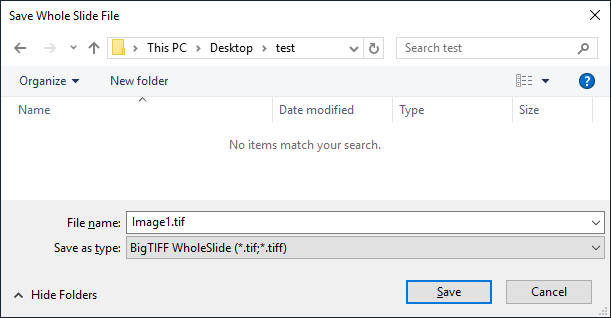
For Standard BioTools MCD files, all ROIs will be processed and stitched together in the resulting image.
Specifying an output. Instead of specifying an output file manually, the -o or -output switches can be used in the command line. These switches must be placed before the input file.
Anonymisation. To exclude label and macro images from the output, the images can be anonymized using the -a or -anonymize switch.
Batch processing with scripts. ImageToTiff does not include a batch processing mode, however this can be achieved using Windows Powershell:
Get-ChildItem -Filter *.mcd -Recurse |ForEach {& "C:\Program Files\Visiopharm\ImageToTIFF.exe" -o $_.FullName.replace([System.IO.Path]::GetExtension($_.FullName),".tif") $_.FullName}" */
| Command part | Description |
|---|---|
Get-ChildItem | Lists files in the current directory |
Filter*.mcd | [OPTIONAL] Only process images with a certain |
Recurse | [OPTIONAL] recurse into subdirectories to find images |
"C:\Program Files\Visiopharm\ImageToTIFF" | Full path to the executable |
-o $_.FullName.replace( ... ) | [OPTIONAL] Specifies the output file by taking the input filename and path ($_.FullName) and replacing the extension (as calculated by [System.IO.Path]::GetExtension) with “.tif” |
$_.FullName | The input file to be processed. Piped from Get-ChildItem |
-DontMerge | [OPTIONAL] Using it disables merging of multi MCD sub-images into one single tiff |
-MinDPmm | [OPTIONAL] Skip resolution layers with resolutions higher than the first layer that meets MinDPmm |
A version can also be created by using the following script. This will also output the name of the file currently being processed:
"Get-ChildItem -Filter *.mcd -Recurse | ForEach {Write-Host "Processing "$_.FullName;& "c:\Program Files (x86)\Visiopharm\ImageToTIFF.exe" -o $_.FullName.replace([System.IO.Path]::GetExtension($_.FullName),".tif") $_.FullName; Write-Host ""};pause"
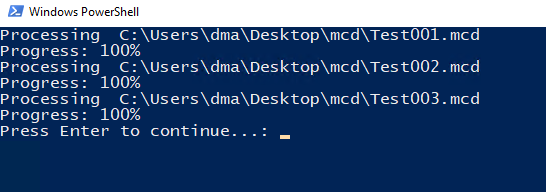
This script can be saved in a text editor with the extension .ps1, which can be copied to any folder with images and then run.