Working with the images
Analyzing and annotating images in the images tab
-
Click on

-
Click on the image you want to work with. Now annotate or analyze the image as desired.
-
Once you're done working with the image, click on Save in the top-left corner.
you MUST save the image in a folder since images cannot be associated with results or overlays if they are not located in a study.
-
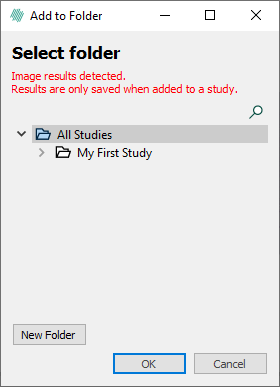
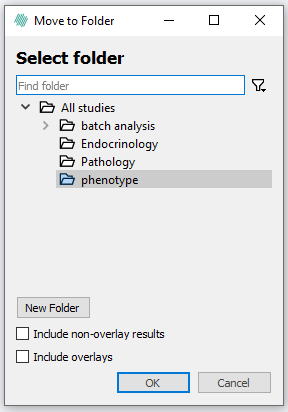
The Add to Folder dialog will appear with the indication that the image must be saved in a study to save the associated results and overlays. Select a folder.
-
Click OK.
-
The image has now been saved together with the results and overlays.
The image can still be found in the ![]() tab without any results or overlays. This makes it possible to have the same image with different results and overlays depending on the study it is saved to.
tab without any results or overlays. This makes it possible to have the same image with different results and overlays depending on the study it is saved to.
Analyzing and annotating images arranged in a study
-
Click on
 .
. -
Navigate to the right folder in the navigation area.
-
Click on the image you want to work with. Now annotate or analyze the image as desired.
-
Once you're done working with the image, click on Save in the top-left corner.
-
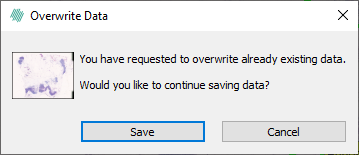
A confirmation window appears to ensure that you do not overwrite anything by mistake. If you still want to save it, click Save, otherwise click Cancel.
-
The image has now been saved together with the results and overlays.
Deleting Images
-
Click on
. -
Right-click on the image or image selection and select Remove image from database to delete it.
If the image is part of an existing study, the image CANNOT be deleted. You must first remove the image from the study/studies before you can delete it.
-
A confirmation window appears to ensure that you do not delete anything by mistake. If you still want to delete it, click OK, otherwise click Cancel.
-
The image has now been deleted from the database.
Adjusting the details view
-
Click on
 and select
  .
. -
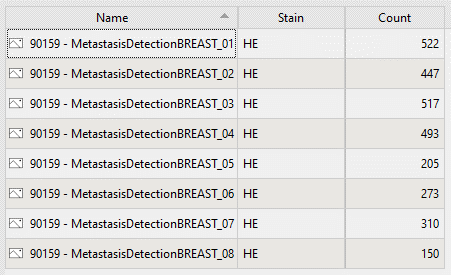
The content view now shows the images and the associated metadata in a table-like view. If you are in
, results for each image will also be shown. -
To adjust the Details view, right-click on the top row where the title of each column is shown.
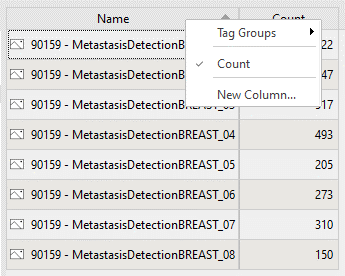
In the right-click menu, you can see all columns or results associated with the images showed in the content view. Columns with no checkmark are currently not visible in the content area but will be if you check them.
You can also see tags associated with the images in the content view:
-
Select Tag Groups in the dialog.
-
Select the tag group you want to show in the content area.
Adding columns of data to images
-
Click on
. -
Navigate to the right folder in the navigation area.
-
Click on the image you want to work with.
-
Click on
and select . -
Right-click on the top row where the title of each column is shown.
-
Select new column.
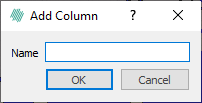
-
Type a name for the column (This cannot be renamed later) and click OK.
-
The new column has been created.
-
Double-click on the cell and start typing
The manually created columns are green to make it easier to distinguish between manually and automatically generated columns.
Move columns in details View
-
Click on
. -
Navigate to the right folder in the navigation area.
The Name column will always be first and cannot be dragged.
Move or copy images to another folder
Select the image(s) and right click in studies, and either choose 'move to folder' to move the selected image(s) to the selected folder, or 'copy to folder' to copy the selected image(s) to a new folder.

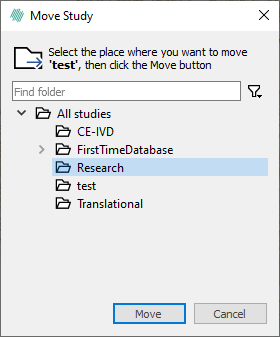
Select your preferred destination and click OK.
When choosing "Move to folder" the image will be deleted in the original folder.