Batch Analysis
Batch Analysis allows multiple image analysis tasks to be run in a single operation. This is useful when there are a large number of images to be analyzed with the same APP(s). Batch Analysis can be used to analyze images from a single slide or from multiple slides.
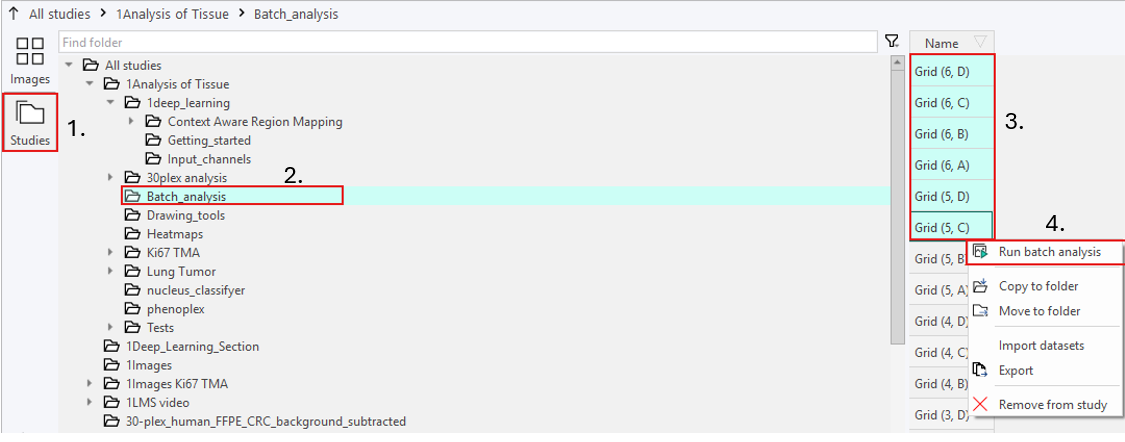
Analyze a selection of images
-
Click on
 .
. -
Navigate to the right folder in the navigation area.
-
Select the images to analyze using
Ctrl + click. -
Right-clickand select Run batch analysis.
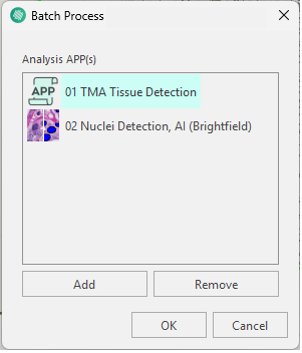
- The Batch Process dialog will then open, select the APP(s) to use by clicking Add and selecting the APP(s) in the APP Selection dialog.
Apps run in a top-down order. As their position cannot be modified once added, it is important to add them in the intended execution order.
-
Once the desired APP(s) have been added, click OK.
-
The images are now added to the queue, which processes the images in the background. A notification in the bottom-right corner will indicate when processing starts and when it is completed.
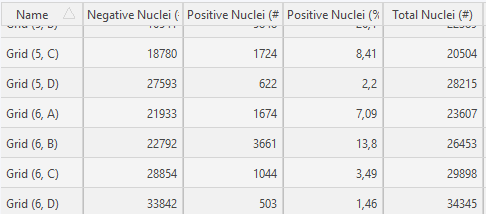
Results will automatically be added to the images within the study once the analysis has been finalized.
As the images are processed, results will appear one-by-one. If no results are visible after the queue has processed the images, try refreshing the database by selecting another folder. The results should now appear in the study after returning to the original folder.
APP Sequences
APPs can be linked together in a sequence of APPs executed after each other. A sequence of APPs can be selected from the batch process dialog by adding several APPs, the Apps will then run in a top-down order. As their position cannot be modified once added, it is important to add them in the intended execution order. The following is an example of a simple sequence of two APPs one to detect the tissue and one to afterwards detect the nuclei within the tissue.
Alternatively to manually adding each App individually each time you run a batch analysis it is possible to save a folder as an APP sequence. An APP sequence is created manually in the file system by creating a folder which ends with 'Sequence' or 'Seq' and adding the APPs to be used in the sequence into the folder.
APPs in a sequence are executed in alphabetical order.
When an APP sequence folder is selected in the batch processing dialog the APPs contained in the Sequence are added to the list of analysis APPs automatically.
Creating a sequence folder within a sequence folder is not supported and will result in an error.
Analyze folder(s)
-
Click on
. -
Navigate to the right folder in the navigation area.
-
Select the folder(s) to be analyzed.
Only the images directly within the folder will be analyzed, not the images located in subfolders.
-
Right-click on the folder and select Run batch analysis.
-
In the Batch Process dialog, select the APP(s) by clicking Add and choosing the APP(s) in the APP Selection dialog.
-
After adding the desired APP(s), click OK.
-
Images in the selected folder(s) are now added to the queue and processed in the background. A notification in the bottom-right corner will indicate when processing starts and when it is completed.