QuickStart APPs
QuickStart APPs are a set of prebuilt APPs included in the Visiopharm software that provide an easy entry point to image analysis. Instead of building an APP from scratch, QuickStart APPs are apps that are already trained and set up to produce good classifications for each of their individual use cases (e.g., a QuickStart APP for tissue detection). These apps therefore allow users to get started quickly with their image analysis.
QuickStart APPs are designed for both new and experienced users and can be used as standalone tools or combined into more complex workflows. For beginners, QuickStart APPs act as an introduction to image analysis by providing preconfigured APPs that can instantly run an analysis on an image. For more advanced users, they serve as a flexible starting point that can be modified and expanded to fit user-specific research needs. This makes them a great stepping stone for developing customized analyses without starting from scratch.
Downloading QuickStart APPs
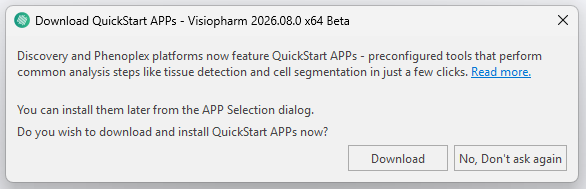
When opening Visiopharm, a pop-up menu will appear prompting the download of the QuickStart Apps. Simply click the  button.
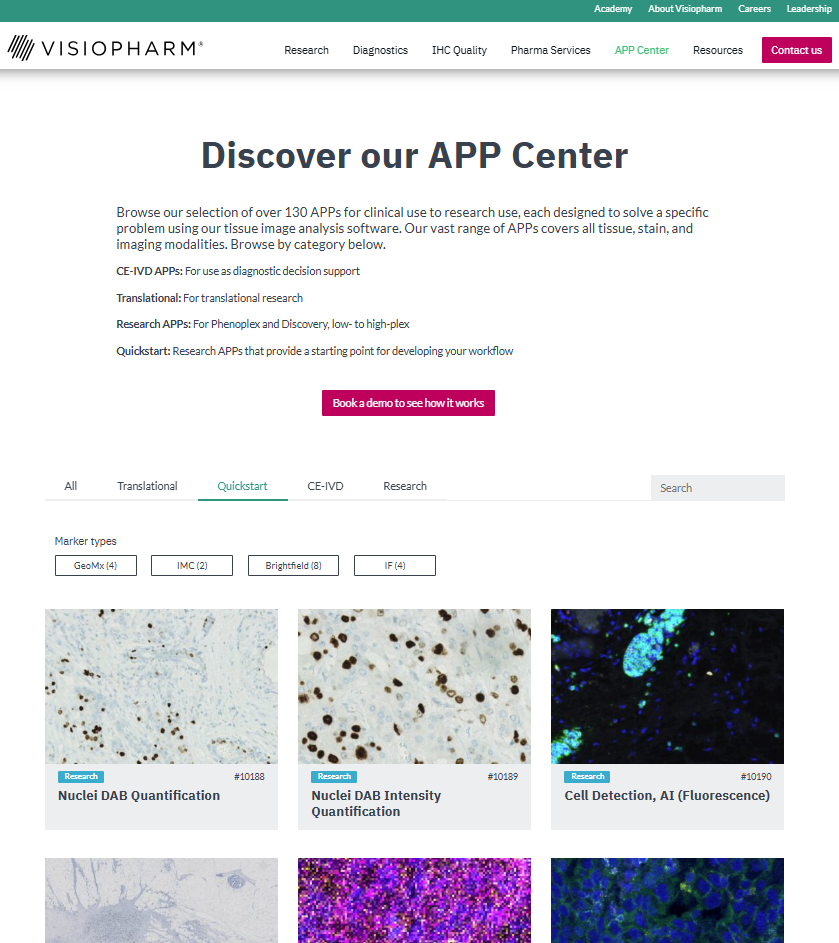
Clicking the Read More will open the App Center, which provides descriptions of the different QuickStart Apps and other available APPs.
button.
Clicking the Read More will open the App Center, which provides descriptions of the different QuickStart Apps and other available APPs.
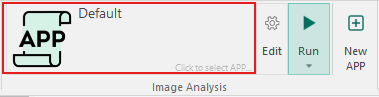
Alternatively, QuickStart APPs can be downloaded by first opening the Analysis Protocol Package (APP Selection) under Image Analysis in the ribbon.
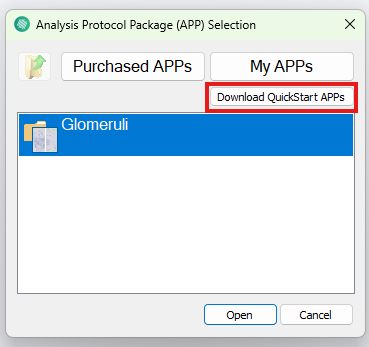
Then, click the Download QuickStart APPs button in the top right corner of the APP Selection dialog.
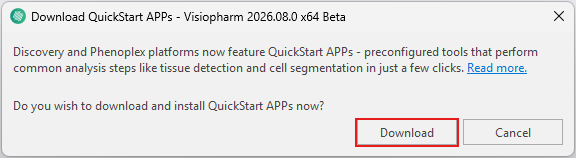
A confirmation dialog will appear asking you to confirm the download. Click the Download button once more to begin downloading the QuickStart APPs.
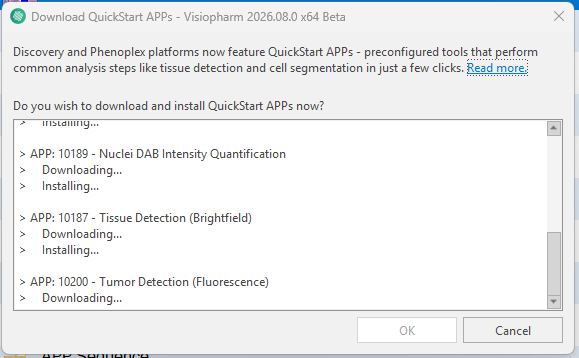
The QuickStart APPs will now be downloaded one by one. The download progress can be monitored while the APPs are being downloaded.
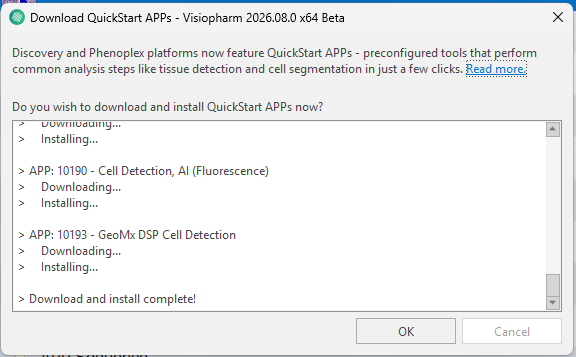
Once all QuickStart APPs have been downloaded, a Download and Install Complete! message will appear. Click the OK button.
To keep the Quickstart APPs up to date, click the Download Quickstart APPs button periodically. After the initial download, clicking the button again will only download newly added APPs or APPs for which newer versions are available.
Choosing between QuickStart APPs
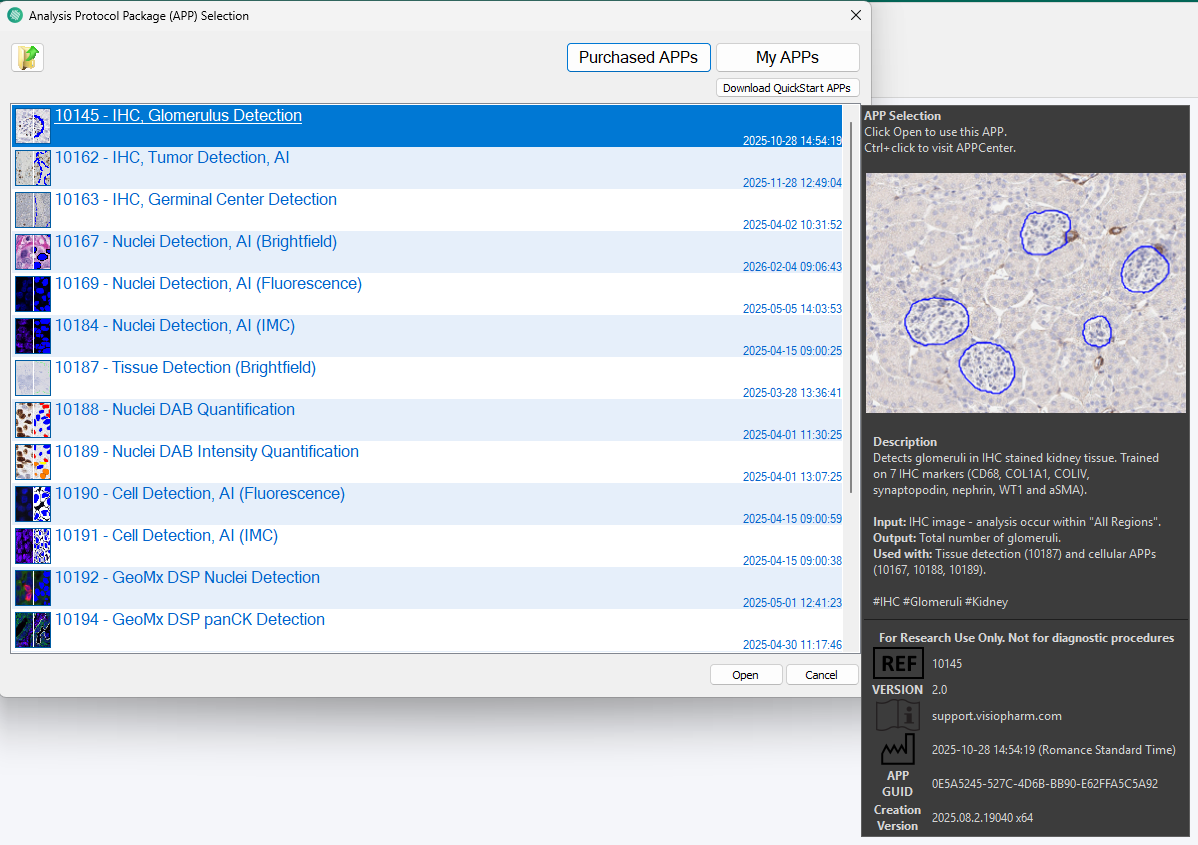
The QuickStart APPs can be found under Purchased APPs in the APP selection menu, within the QuickStart folder. From there, the APPs are ready to use. When hovering over the different QuickStart APPs in the APP selection menu, an information dialog with APP information appears. Most importantly the information dialog includes:
- A description of the APP
- What type of input image/images it is suited for
- What type of output it generates
- What other QuickStart APPs it is often used with in analysis workflows.
This is useful when determining what Quickstart APP/APPs is most correct for the given image type and analysis goals. For instance the description of the 10145 - ICH, Glomerulus Detection APP explains that it detects glomeruli in ICH stained kidney tissue, and that it is trained on 7 ICH markers (CD68, COL1A1, COLIV, synaptopodin, nephrin, WT1 and aSMA). Additionally, the dialog clarifies that the input image/images should be an IHC image, and the analysis happens in all regions of the image. The output of this app is the number of glomeruli, which will appear under results and in the database when the APP has run and the results are saved.
Apart from the information dialog in the APP Selection, the APP Center on the Visiopharm website also provides detailed information about the different available apps.
Combining QuickStart APPs
It is often part of an analysis workflow to run several APPs in succession of each other. As suggested by the information dialog example above, the 10145 - ICH, Glomerulus Detection APP is often used in combination with other APPs, for instance a common workflow could be the following:
- Start off with a raw unclassified image, and run the tissue detection app 10187 - Tissue Detection (Brightfield) to find the tissue regions in the image.
- Then run the next app, 10145 - ICH, Glomerulus Detection APP only on the found tissue sections.
- Following this, depending on the goal of the analysis a Celluar APP such as the 10167 - Nuclei Detection, AI (Brightfield) is then run only within the determined glomerulus.
For contrast running the nuclei detection APP on the full image would find all nuclei in the image, both the relevant ones within the glomerulus but also all other nuclei, this would be computationally expensive and possibly also hinder understanding of the results.
This process of running several Apps in sequences can be streamlined with the use of APP sequences which is further described under APP Execution.
Editing QuickStart APPs
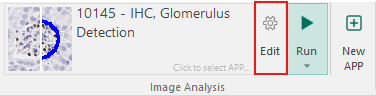
As for any user build APP the QuickStart APPs can be tuned and edited to better fit the specific analysis needs. As for a costume made APP, first select the APP under APP selection then click Edit in the Image Analysis section of the ribbon and the APP author dialog will open.
Common examples of how to customize the QuickStart APPs include, but are not limited to:
- Doing additional training on a QuickStart APP with the users own images. For more detail on how to continue training on new images review the Training a Deep learning APP section.
- Adding, removing or changing the output variables. For more detail see the Output Variables section.
- Adding, removing or changing the post processing steps. For more detail see the Post processing section.
All QuickStart apps include comments for each post processing step. Review these comments to understand when a step is needed and how it should be configured.
Some APP modifications require retraining. In these cases, the benefit of the pretraining in the QuickStart APPs will be lost.
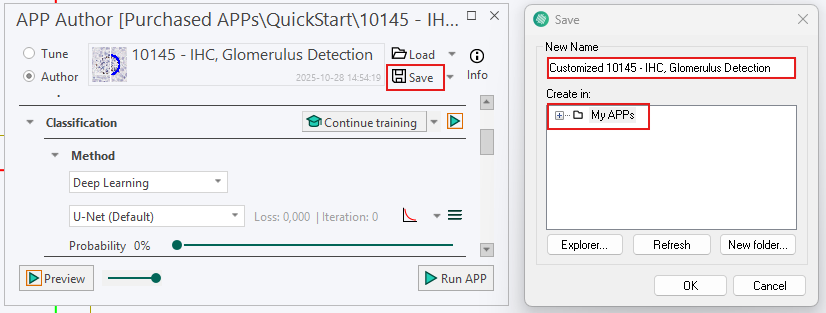
Once the customization of the QuickStart APP is completed, the APP needs to be saved as a new APP in an appropriate folder. Click save in the top of the APP Author, Select an appropriate name (the default is the name of the QuickStart APP), and click OK.