Post Processing
The Post Processing section is the fifth section in the APP Author dialog. It is used to refine classification results and make them suitable for further analysis.
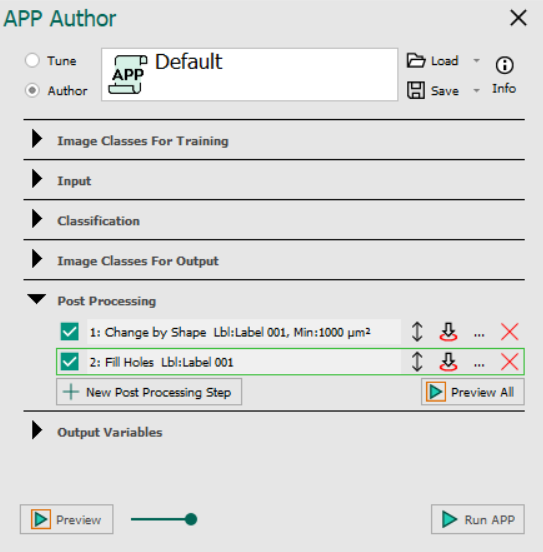
In most cases, the initial classification result produced by a deep learning classifier or another classification method will contain minor misclassifications and imperfections, even when the classifier has been trained well. Applying post processing steps can help address these issues by removing noise, correcting misclassified regions, and refining object boundaries. Furthermore, in many analysis workflows, several APPs are run in sequence. In such cases, it is important that the output of one APP is suitable as the input to the subsequent APP. Preparing results for use in downstream APPs is another task that can be accomplished through post processing.
Overview of Post Processing Steps
The table below provides a brief overview of the available post processing categories and their typical use cases. For a detailed explanation of the available steps and their full functionality, refer to the section for each post processing category.
| Post Processing Category | Description | Example Use Cases |
|---|---|---|
| Change | Reassign classified objects based on criteria such as label, size, shape, surrounding objects, and more. | Reclassify object labels that are incorrectly labelled, remove the background label or small artefacts by changing them to clear. |
| Morphological | Modify the shape and boundaries of classified objects. | Fill holes, remove noise, separate merged objects, erode or dilate object labels. |
| ROI | Create or modify ROIs | Generate ROIs from labels to prepare results for use in subsequent APPs. |
| Annotation | Create or modify annotations. | Generate annotations from labels. |
| Feature Based | Identify and mark areas of interest based on image features such as object heatmaps. | Identify hotspots, mark local maxima, and detect regions with the highest feature intensity. |
| Processing Help | Add comments within the post processing workflow. | Explain the purpose and usage of individual post processing steps. |
| Custom | Execute custom post processing scripts. | Implement workflow-specific functionality that is not covered by the standard post processing steps. |
Applying Post Processing Steps
Post processing steps are added by clicking the  button in the Post Processing section. This launches the Add post process dialog.
All available post processing steps are displayed in a scrollable panel on the left, grouped into their respective categories. When a post processing step is selected, its configuration options are displayed in the panel on the right. Configure the step by selecting the appropriate labels, ROIs, and annotations from the available drop-down menus and entering any required parameter values.
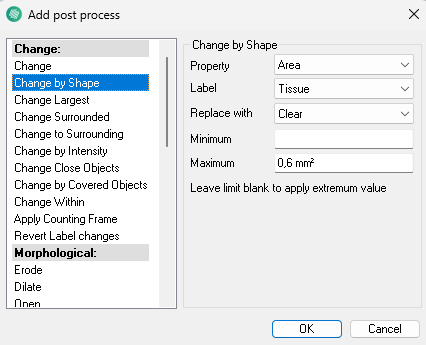
Once the step has been configured, click OK to add the step to the post processing list.
New post processing steps are always added to the bottom of the post processing list. Since post processing steps are executed from top to bottom, the newly added step may need to be moved to a different position in the list.
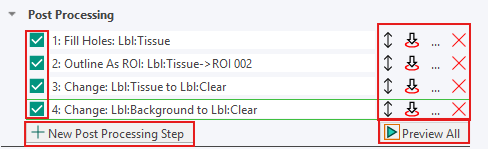
The post processing section provides several controls for managing, modifying, and monitoring the execution of post processing steps. These controls are shown in the image and described in the table below.
| Button | Description |
|---|---|
 | Toggle on/off to enable or disable the selected post processing step. |
 | Change the execution order of post-processing steps. Left-click and hold the icon to drag a step up or down. The list of post processing steps are executed from top to bottom. |
 | Preview the result in the FOV after executing all post processing steps up to and including the selected step. |
 | Edit the post processing step. Double-clicking a post processing step has the same effect and also launches the Add post process dialog |
 | Delete the selected post processing step. |
| Add a new post processing step and launches the Add post process dialog. |
 | Preview the result of running all post processing steps, in the post processing list, in the FOV. |
A step-by-step Example
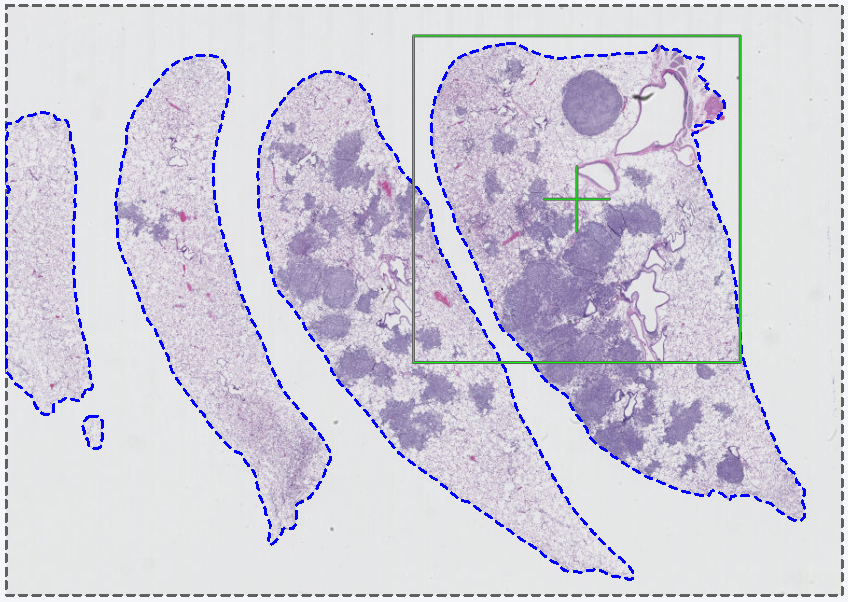
In this example, we will apply post-processing steps to a well-trained Tissue Detection App. We will use the 10187 - Tissue Detection (Brightfield) App from the QuickStart Apps. This app includes several preconfigured post-processing steps, but for the purpose of this example, all existing post processing steps have been removed so that only the raw classification result remains. The images below show the original lung tumor image and the raw classification result produced by the APP.
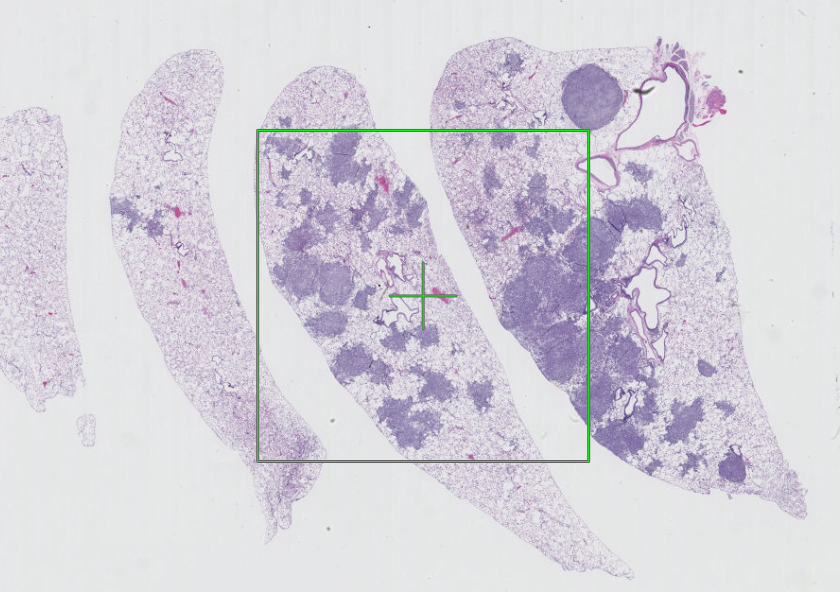
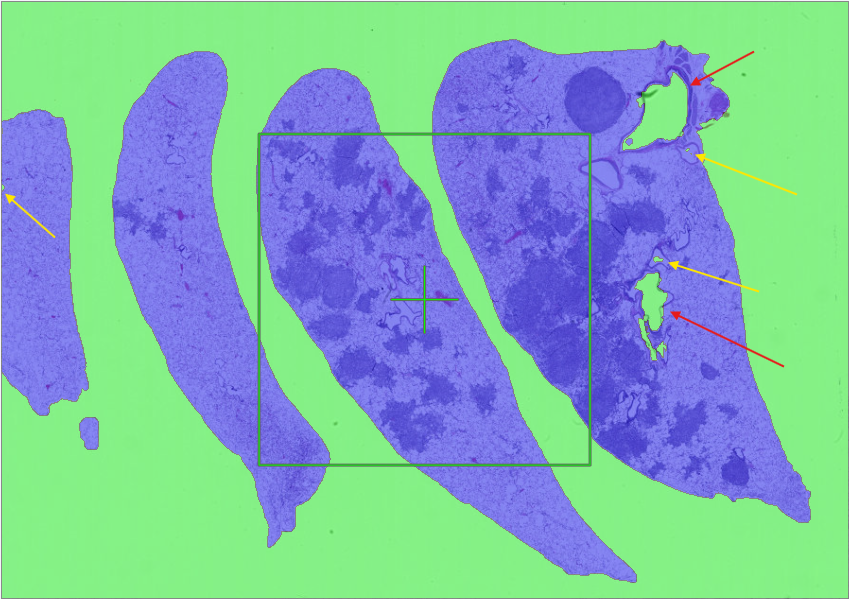
The original lung tumor image (left) and the raw classification result (right).
The classification already performs well and correctly separates most tissue from background. This indicates that the model is well-trained, and additional training is unlikely to significantly improve the result. However, the classification still contains small misclassifications (yellow arrows), and holes within tissue regions that are classified as background (red arrows). For this analysis, it is preferred to include these holes as part of the tissue label, so the tissue forms a connected object.
To achieve this, we will use the Fill Holes post-processing step.
- Click the button, and the Add post process dialog will appear.
- Scroll through the list of post processing steps and choose the Fill Holes step under Morphological by clicking on it.
- In the configuration panel that opens on the right choose the following configurations in the drop-down menus:
-
Object label = Tissue
-
Fill label = Tissue
Since the holes are located inside tissue labels, both Object label and Fill label are set to Tissue.
- Click OK to add the post processing step to the post processing list. This is illustrated in the left image below.
- Move the FOV to an area containing misclassifications and holes.
- In the Post processing section preview the effect of the added post processing step by clicking on the icon, or because we only have one post processing step the Preview All button could also be used. This is shown on the right image below.
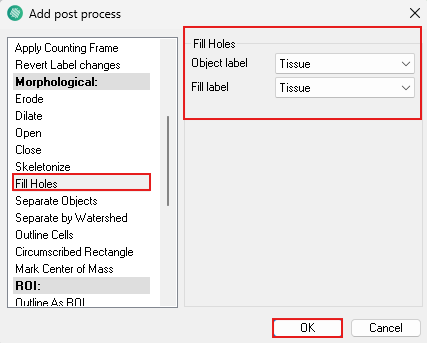
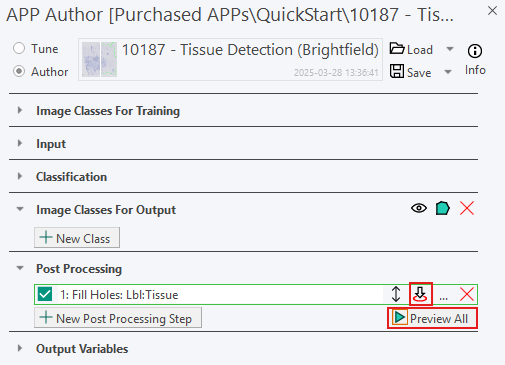
The Add post process dialog for the Fill Holes step (left) and the Post Processing list after adding the step (right).
Inside the FOV the preview now shows that both the noise and the holes have been relabeled as Tissue. This is shown in the image below.
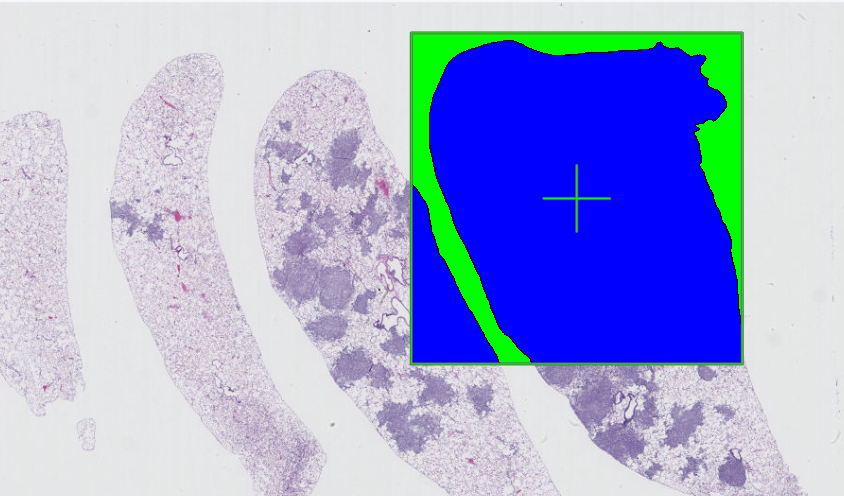
After applying the step, the holes inside the tissue have been filled and the tissue is a continuous object. Examples of additional post-processing steps that could be useful include:
- Change by Shape to remove the small tissue fragment on the left.
- Change Surrounded to remove tissue fragments touching the image border.
But for this example, the classification result is now satisfactory.
In many workflows, Tissue Detection is only used to identify where tissue is located before running another APP. For example, after finding the tissue regions, a Tumor Detection APP could be used to locate tumors within the tissue. To use the detected tissue as input for a later analysis step, the tissue labels must be converted into ROIs.
To convert the classification results into ROIs we make use of two different post processing steps; Outline as ROI and Change.
- Click the button, and the Add post process dialog will appear.
- Scroll through the list of post processing steps and choose the Outline as ROI step under ROI by clicking on it.
- In the configuration panel that opens on the right choose the following configurations in the drop-down menus:
- Label = Tissue
- To ROI = ROI 002, or another unused ROI type.
- Click OK to add the post processing step to the post processing list.
To clearly see the resulting ROI, now add the Change step twice: first to change the Tissue label to Clear, and then to change the Background label to Clear. This removes the classification labels and leaves only the generated ROI visible.
- Click the button, and the Add post process dialog will appear.
- At the top of the list of post processing steps choose the Change step under Change by clicking on it.
- In the configuration panel that opens on the right choose the following configurations in the drop-down menus:
-
Label = Tissue
-
Replace with = Clear
In order to select the clear or background label, scroll up in the drop-down menus, and they will appear above the other labels.
- Click OK to add the post processing step to the post processing list.
Post-processing steps are executed from top to bottom. Therefore, any Change → Clear steps should be placed after all other steps that operate on the affected labels. Use the icon to change the execution order.
- Repeat step 11-14, but select Label = background, to change the background to clear as well.
Use the preview tools after each added post-processing step to verify that the result is moving in the desired direction before continuing.
The Post Processing list and preview when applying all four steps can be seen in the image below:
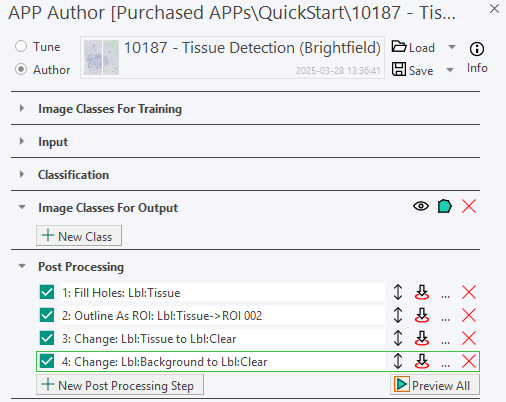
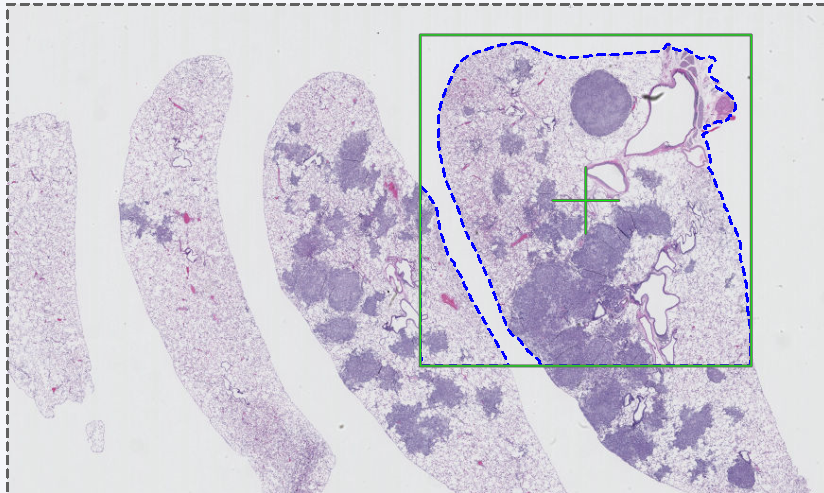
The Post Processing list with the four steps (left) and the preview using the four steps (right).
- The post-processing setup is now complete. Click Run APP to apply the steps to the entire image. The final result is shown below.