Threshold
In this section, you will learn how to set and adjust thresholds to differentiate between various phenotypes within your tissue samples. Proper thresholding is crucial for accurate phenotype identification.
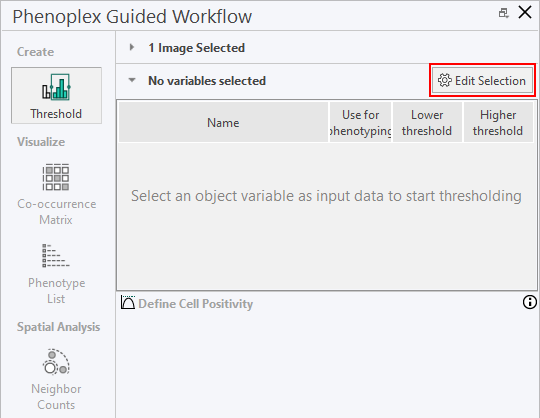
In the Threshold menu you can select any number of variables you wish to analyze with Phenoplex.
Edit Selection
To select these variables, click on Edit Selection button.
Select the variables and then click Ok.
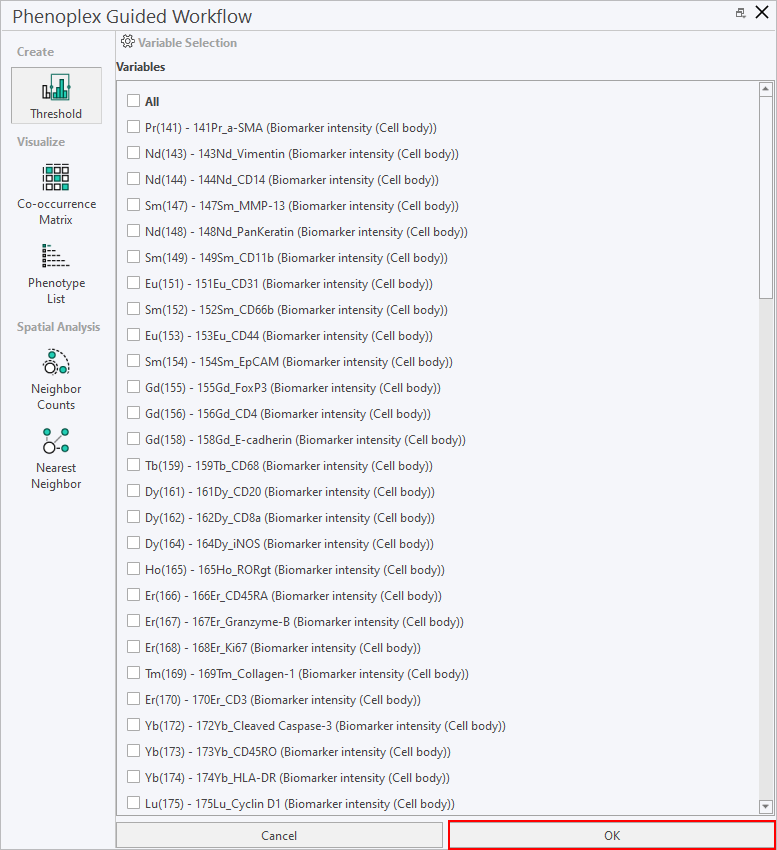
Variables
The resulting list of variables will display the name of the variable, whether or not it is used in the phenotyping, as well as the lower threshold, and the higher threshold.
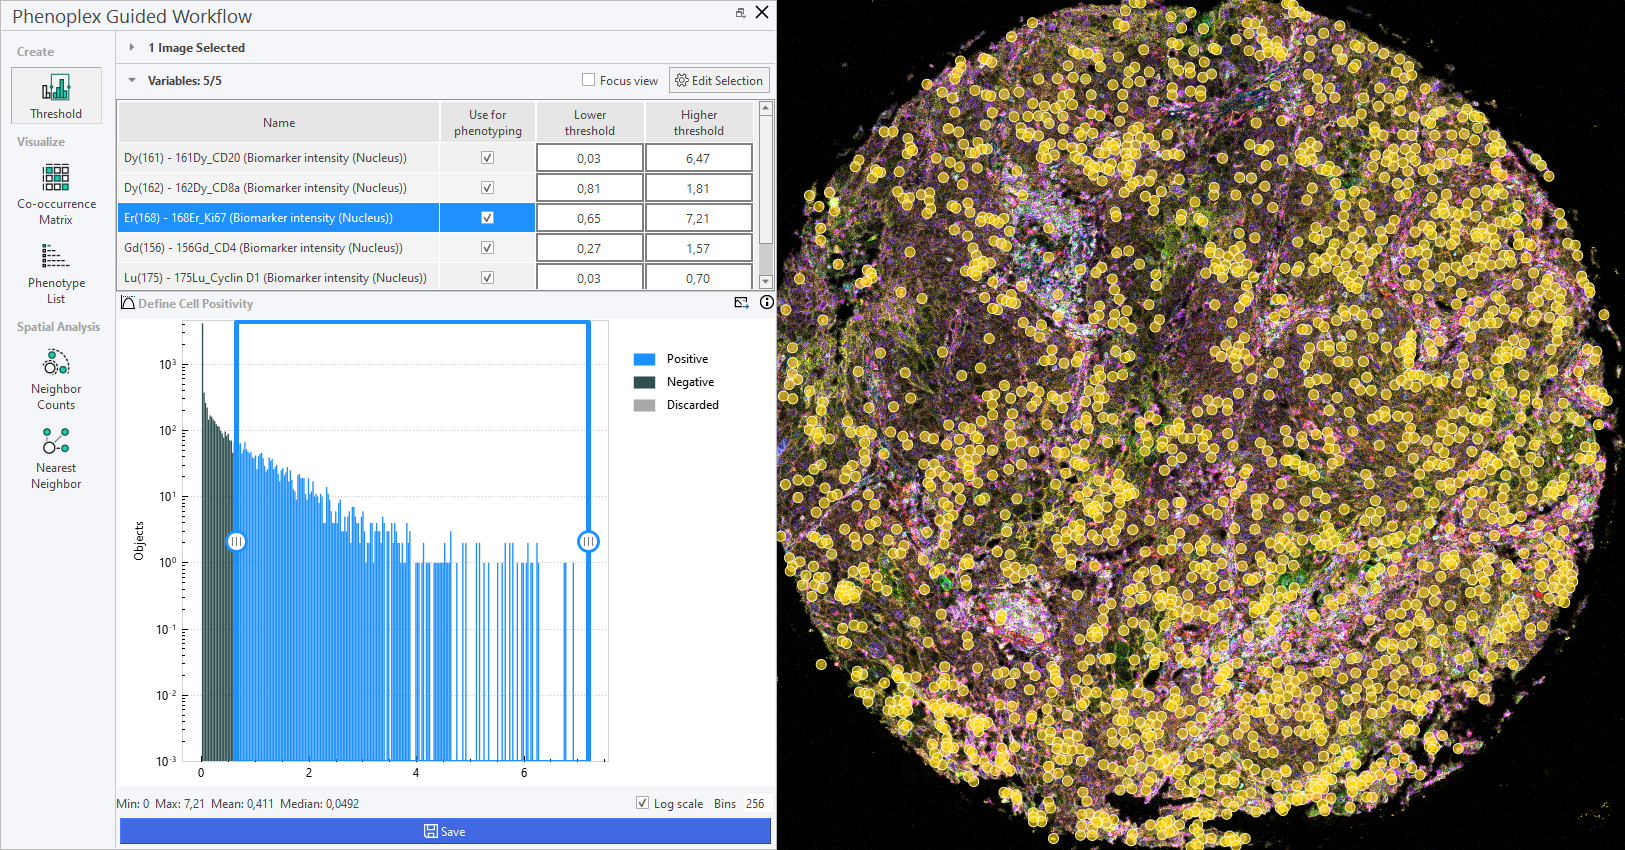
| Variable | Phenotyping | Lower Threshold | Higher Threshold |
|---|---|---|---|
| Name of the variable | Whether or not the variable is used in the phenotyping | The lower threshold for the variable | The higher threshold for the variable |
Define Cell Positivity
The Define Cell Positivity graph can be used to change the threshold of cell positivity by dragging the sliders from either left or right or by editing the values for the lower and higher threshold.
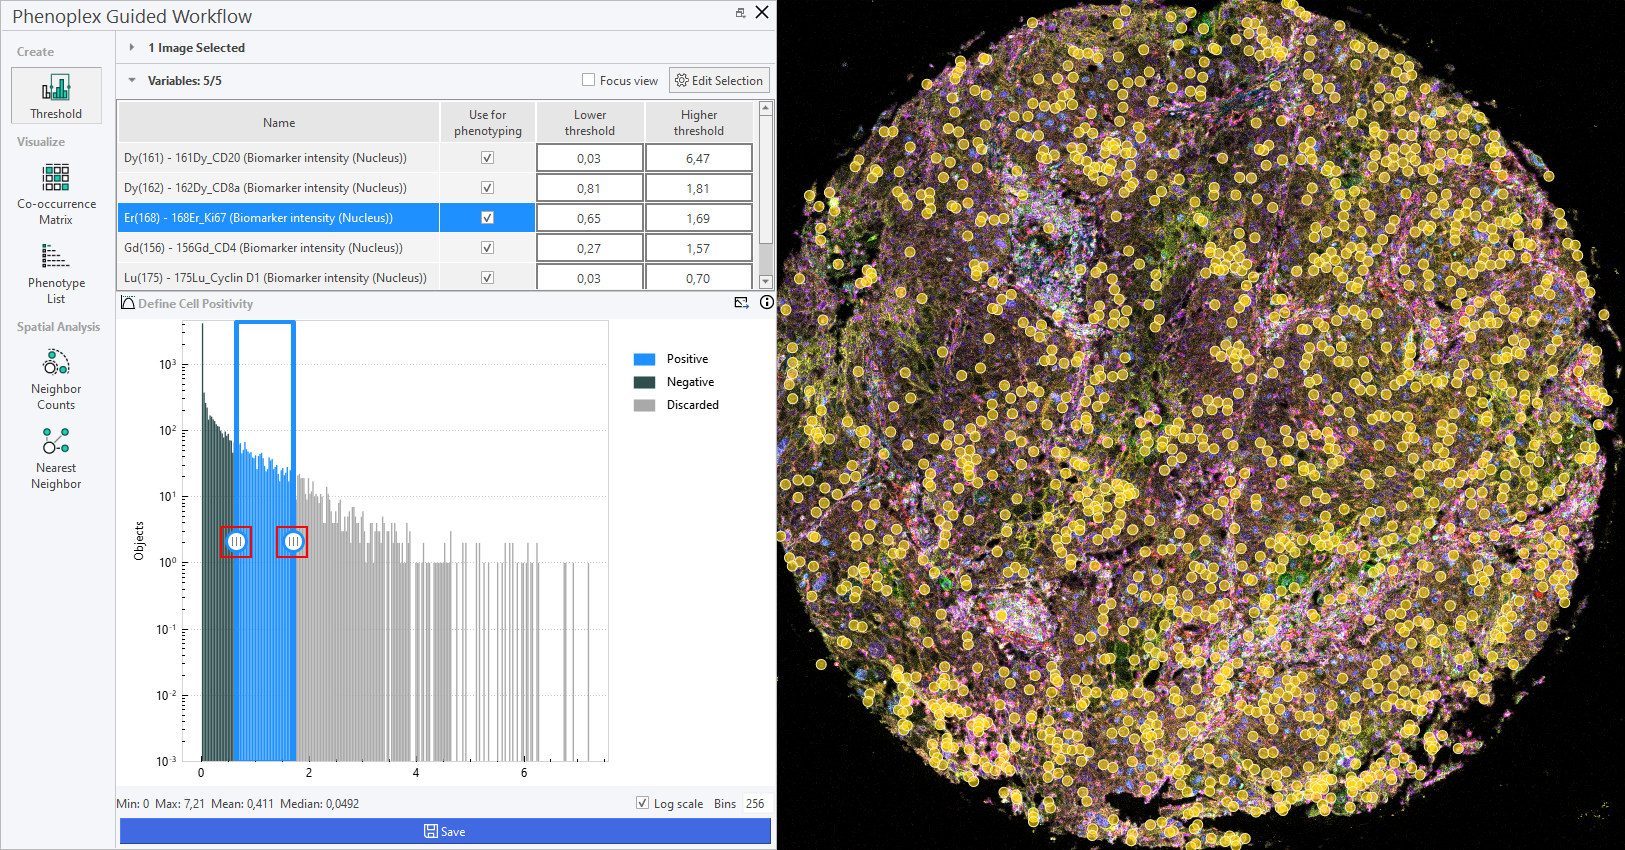
Also keep in mind that this graph is logarithmic by default, which can be changed in the lower right corner of the graph. The number of bins in the graph is 256 by default, but can be changed if needed. It is possible to zoom in on the graph by scrolling with the mouse wheel. To reset the zoom on the graph, double-click on it.
After adjusting the threshold in the graph, some of the positive cells might have turned negative. If you click Save, as seen at the very bottom of the menu, the postivity settings will be saved to the image as the variable Threshold.
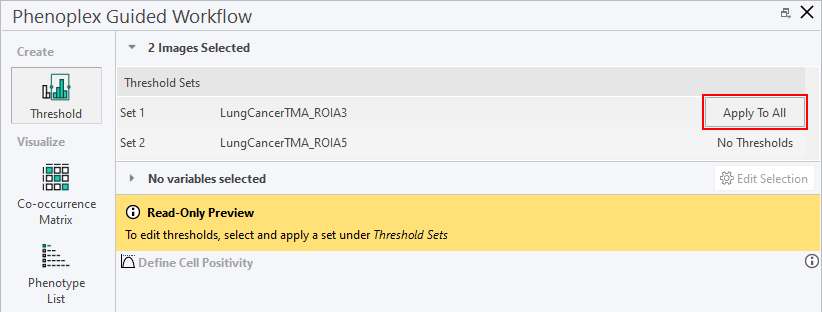
Apply saved thresholds to new images
You can apply previously saved thresholds to new images. This can be done by loading all desired images into Phenoplex by launching Phenoplex, and then clicking the checkmark in the database for each additional image.

Make sure that the images you are applying the thresholds to have been analyzed with the same APP as the images that the thresholds were saved from.
A dialog box will appear indicating that the additional images are being loaded into Phenoplex. After this is done, a saved threshold can be applied to all images loaded into Phenoplex, by clicking Apply To All, which will apply the threshold of the image in question to all other images in Phenoplex.