APP Sequences
It is possible to run multiple APPs in sequence on an image or multiple images. Instead of manually adding each APP whenever a batch analysis is performed, APP Sequences make it possible to save a predefined set of APPs and execute the sequence directly from the APP selection menu in the ribbon.
APP Sequence Setup
The following is a step-by-step guide illustraiting how to setup an APP sequence for a Glomeruli detection workflow.
- Before building the APP Sequence each APP used in the sequence need to be saved under My APPs in the file explorer. APPs can be saved by clicking the Save APP as icon in the APP Control.
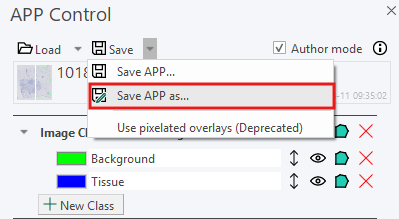
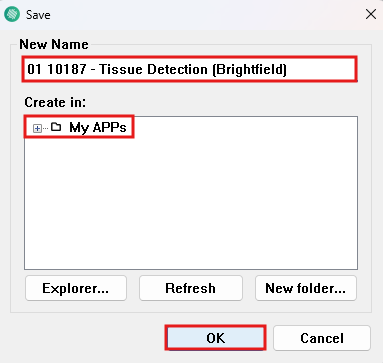
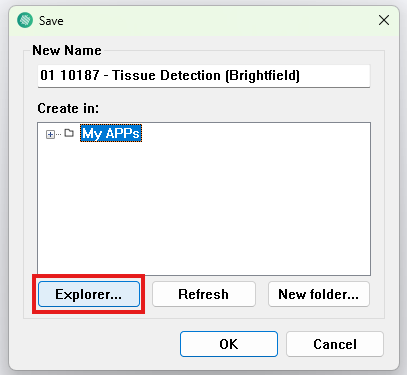
- Once all APPs needed for the sequence are saved. Open the Save dialog again, and click on Explorer.... This will open the APP folder in Windows Explorer.
- Create a new folder with a name that ends either with _seq or _sequence.
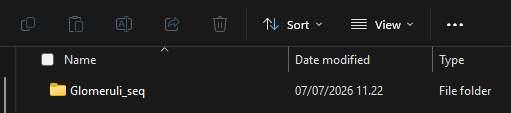
- Place the APPs for the sequence in the created sequence folder and ensure the APP names correspond to the intended execution order.
The sequence will be executed based on the names of the folders in alphabetical and numerical order.
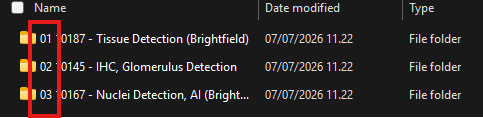
The APP sequence is now ready to be used in Visiopharm.
Execute APP Sequence
To load the APP sequence, click on select APP and select the APP sequence.
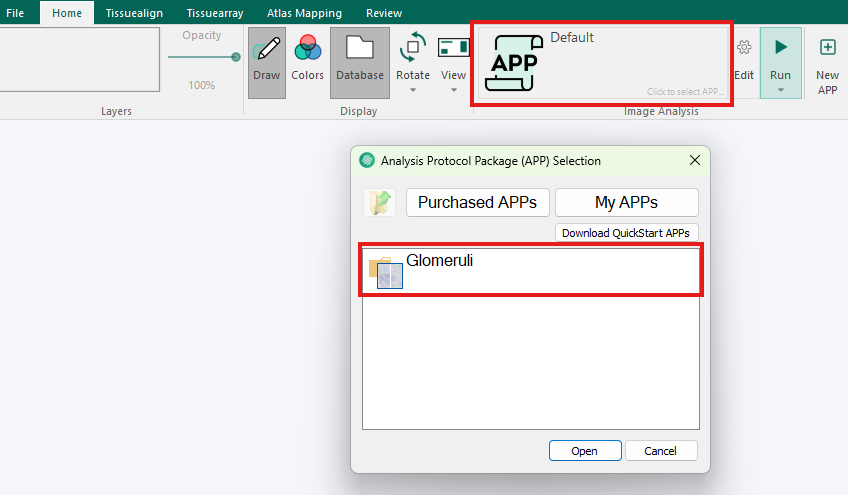
When an APP sequence is loaded, it can then be executed by pressing Run in the ribbon.

Individual APPs from the sequence can be run seperately from the APP Control.
Edit APP Sequence
To edit the APP sequence, select the APP sequence in the ribbon. When the APP sequence is loaded, click the  icon.
icon.
A drop-down menu will appear in the APP Control, where the individual APPs can be selected and modified.
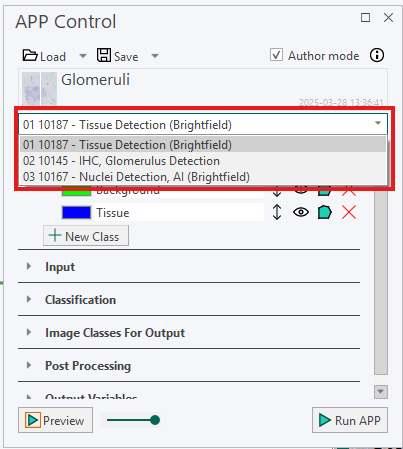
Input and Output Matching
When multiple APPs are run together, the output of one APP must be compatible with the input in the next APP. This applies to APP Sequences, Batch Analysis, and manually running APPs one after another. The example below shows how to inspect an APP's input and output settings and, if necessary, modify them to ensure the APPs work together as intended.
Example of Input and Output Matching
In this example, the workflow consists of three APPs: a Tissue Detection APP, a Glomeruli Detection APP, and a Nuclei Detection APP. Each APP progressively refines the region of interest. The Tissue Detection APP identifies tissue within the image, the Glomeruli Detection APP identifies glomeruli within the detected tissue, and the Nuclei Detection APP can then be applied only to the detected glomeruli.
Tissue Detection
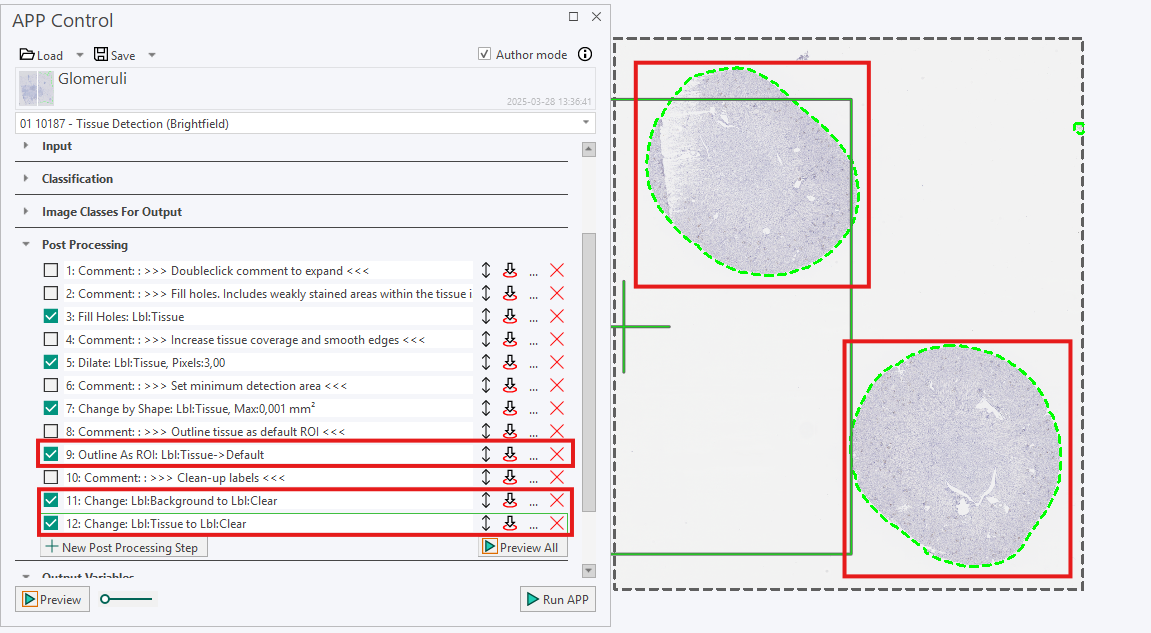
The first APP has Background and Tissue defined as Image Classes for Training.
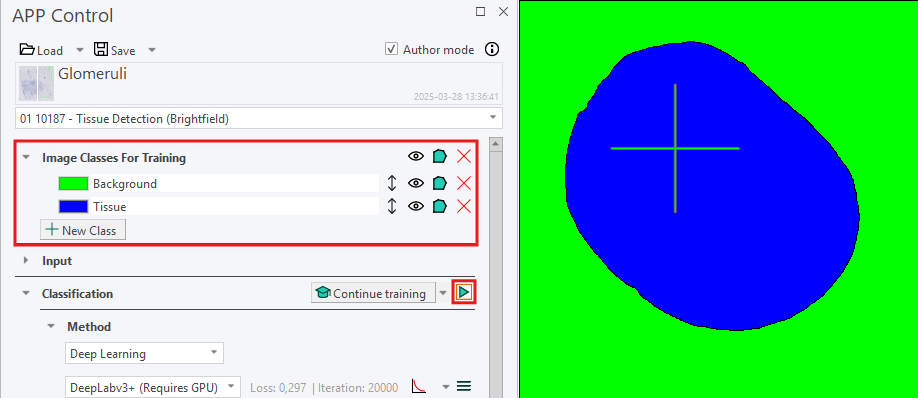
After the APP has been executed, post-processing steps are used to outline the Tissue label with the default ROI. The Tissue and Background labels are then cleared, leaving only the ROIs around the tissue as shown in the image below:
Glomerulus Detection
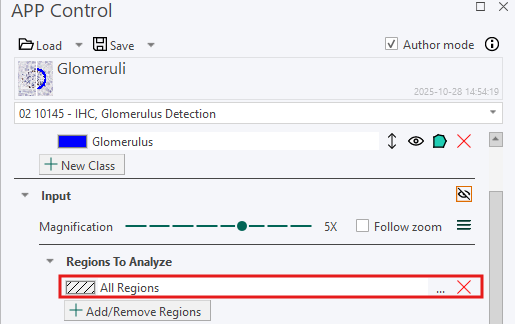
The next APP is intended to detect glomeruli within the tissue identified by the Tissue Detection APP. By default, the APP is configured to run within All ROI, meaning the entire image. To restrict the analysis area to the detected tissue, the APP input must be changed to Default ROI, as this is the ROI created by the previous APP to outline the detected tissue.
Running an APP overwrites any existing labels in the image. For this reason, the detected tissue is converted to a ROI rather than being passed directly to the next APP as a label.
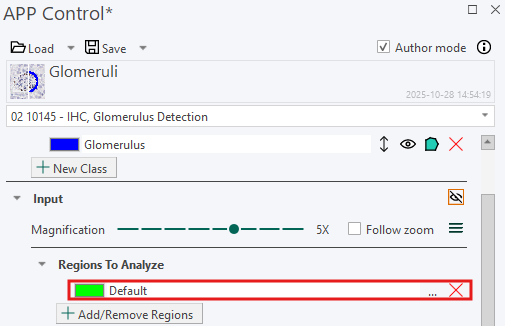
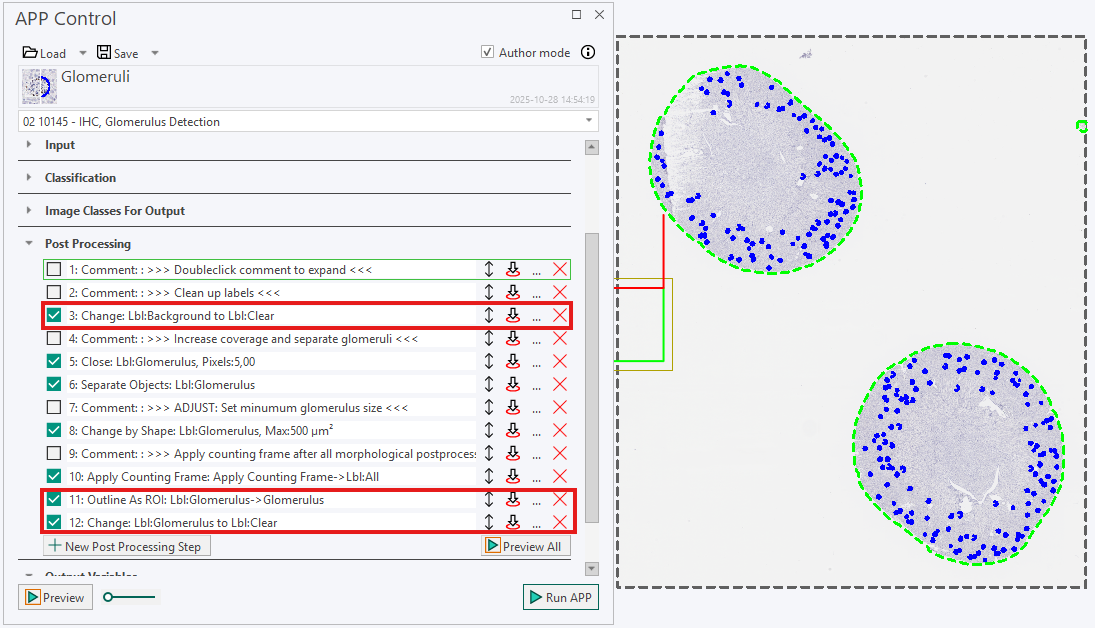
As with the first APP, post-processing steps are used to convert the detected glomeruli into a ROI. In this case, the glomeruli label is outlined using ROI 002, and the generated Background and Glomerulus labels are changed to Clear.
Nuclei Detection
For the third and final APP in the sequence, the input is changed to ROI 002, as this ROI was the output of the previous APP. By restricting the analysis to ROI 002, the Nuclei Detection APP considers only nuclei located within the detected glomeruli, rather than detecting all nuclei throughout the image.
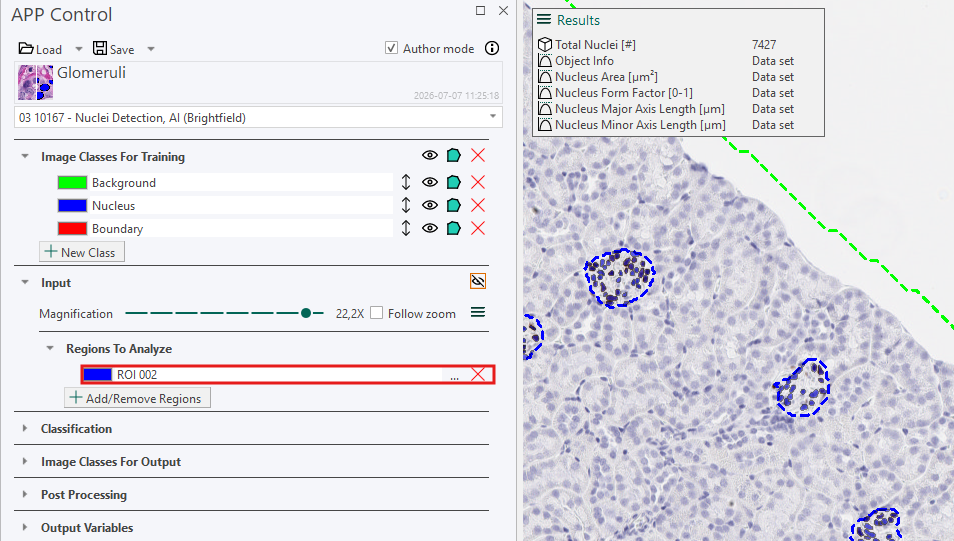
Without these changes, all three APPs would be applied to the entire image. This would significantly increase the computational workload and produce results for nuclei outside the glomeruli.
All information from this article also applies when performing Batch Analysis. For more information on Batch Analysis, click here