Overlay Properties
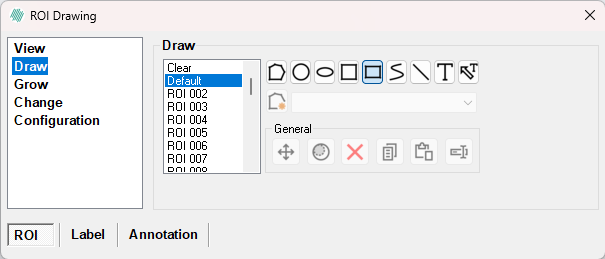
When drawing overlays (ROIs, labels, annotations, and measures) on an image, several properties can be configured and changed to help the layer drawing process. This article focuses on the properties of overlay types other than that of the measure as these are very similar. The properties are found in the list in the left side of the dialog:
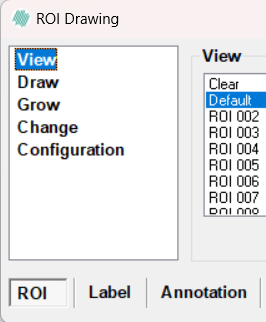
These properties include View, Draw, Grow, Change, and Configuration where these settings can be loaded and saved. In this article ROIs, labels and annotations are commonly referred to as overlays.
- Click the
 in the the Quick Access Toolbar or press Ctrl+Z to undo the last action which changed the overlay in the image. It is possible to undo consecutive actions by pressing the button multiple times.
 - Click the
 in the Quick Access Toolbar or press Ctrl+Y to redo the undone action. It is possible to redo consecutive actions by pressing the button multiple times.
 - Press the Delete key while in ROI/Label/Annotation drawing mode to delete all overlays of the current type in the image.
- Press Esc-key while in ROI/Label/Annotation drawing mode to exit the drawing mode
- The current active overlay can quickly be selected using the number keys according to the position in the list. Press "0" for Clear and so forth. overlays with numbers larger than 9 are selected by pressing the number keys in quick succession (e.g. "1" followed by "9" for ROI/annotation/label #19).
- The master opacity control in the Ribbon
 determines the opacity of the overlay data. The master opacity control will affect all overlay types, including ROIs, labels and annotations. If the slider is all the way to the right (100%), the overlays are not transparent and the underlying image cannot be seen where the overlays are located. If the slider is all the way to the left (0%), the overlay data is totally transparent and only the image can be seen. The opacity control is especially useful when checking whether a classification have been performed as expected. By dragging the slider left and right, it can be checked whether the classification has successfully followed a ridge or an outline
Overlay information
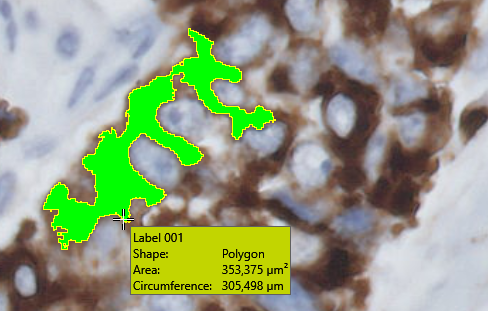
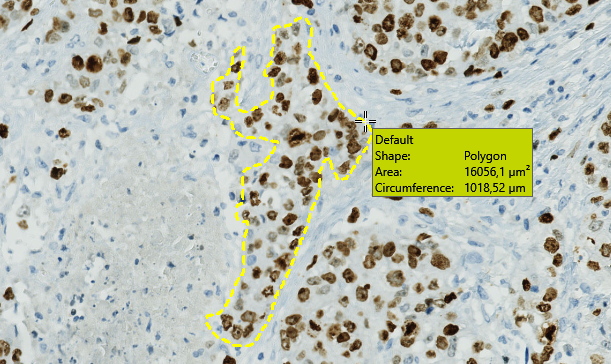
By hovering the mouse cursor over a overlay a quick detail-overview of the overlay will appear. Only when a specific overlay type is selected and when the working area is active (click once inside the area) will the detail-overview appear. E.g. if you wish to view the details of the labels in an image select Label drawing, click once in the working area and hover the mouse cursor over a given label and the details will appear as seen here:
Conversion of overlay types
It is possible to change a overlay type to another overlay type without having to redo the drawing. Enter drawing mode and hover the mouse cursor over the overlay (e.g. a ROI) so the edges light up yellow. Press the middle mouse button while hovering the overlay. A dialog shows up. In this dialog it is possible to select which overlay type the overlay is converted to. It is also possible to convert the new overlay type to another number or keep the overlay type intact and only change the number. It is also possible to add text to the overlay.


Change the type of the ROI and select which label it should change to.
In this case, the ROI has to be changed to Label as type and the Label 001.
View
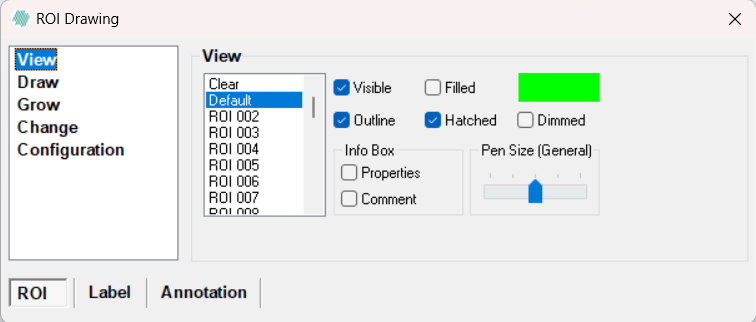
The way the overlays are visualized in the image can be controlled in the View page.
Current active overlay
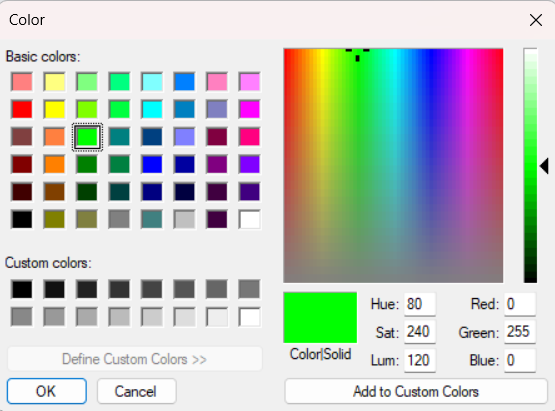
Click in the list of overlays to define the overlay currently used for drawing. The Clear overlay can be used to erase other overlays of the same type in the image. It is also possible to press Delete while the working area is selected. This will delete all overlays of the selected type. Double-click on an overlay in the list seen in the bottom of the wheel to change the name or the color of the overlay. Click on the colored field to assign a new color to the overlay. This will open the Color dialog:
The Check boxes will only affect the currently chosen overlay type and number. I.e. if a box is checked for ROI 001 it will not affect ROI 002 or Label 001 for instance.
- Visible - Check to show the active overlay (default: active for all overlays).
- Filled - Check to have overlay filled out (default: active for labels).
- Hatched - Check to have the overlay hatched/striped (default: active for ROI).
- Dimmed - Check to dim the chosen overlay into a transparent grey color - overrides any color and transparency settings (default: inactive for all overlays).
The Info Box includes the following check boxes:
- Properties - Check to permanently show the information of the active overlay such as shape, area, circumference and comment. If unchecked, the information will automatically show by hovering on a specific overlay. (default: inactive for all overlays).
- Comment - Check to permanently show a comment of the active overlay. It is possible to add a comment by middle-clicking on the active overlay. If unchecked, the comment and properties of the active overlay will automatically show by hovering on the overlay. (default: active for all overlays).
Pen Size (General) can be adjusted to choose the width of the overlay-line. This does not affect the amount of pixels touched by the overlay, it is only a visual aid. This is why the function is turned down (1 pixel wide) with labels since this might otherwise give the impression of a larger than actual marked area.
Draw
In the Draw page it is possible to specify the size and shape of the "pen" that is used to apply the overlay colors to the image.
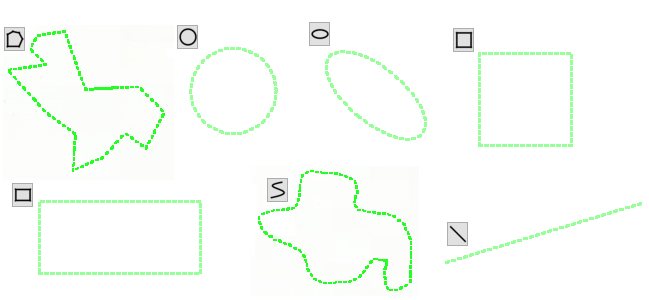
There are seven ways of creating an overlay: Polygon, Circle, Ellipsoid, Square, Rectangle, Poly Line and Line with Poly Line being the default. It is woth noting:
- ROIs: The mode automatically encloses an area with a line from the starting point to the end point of the drawing. - Labels: The mode will only enclose an area if the drawn lines meet up.
Besides the above mentioned drawing modes, the functions Draw arrow ![]() , and Draw text labels
, and Draw text labels ![]() , enables the user
to draw both arrows and text labels.
, enables the user
to draw both arrows and text labels.
Draw or add custom objects
It is also possible to save a custom shape drawn previously. This is done by clicking the "Draw or add custom object"-tool ![]() .
.
- Draw an object (label, ROI or annotation). This object can be made with any of the drawing tools available: Polygon, circle, ellipsoid, etc.
- Press the Add custom object button
 .
. - Press and hold the Ctrl-key, click once inside the working area, then click on the desired shape while it is highlighted.
- A dialog will prompt you to name the shape.
- The shape is now saved, and can be reproduced an unlimited amount of times.
General functions
When an overlay has been drawn it can be moved, deleted, changed and otherwise edited. These functions will only work on the currently selected overlay type. I.e. if you wish to move the ROIs the ROI-mode has to be selected.
| Function | Description |
|---|---|
| Click this button and then click in the working area to be able to move overlays of a specific type. Press and hold Ctrl and click+drag the object if you wish to rotate the object instead of a translatory movement. Press and hold Ctrl + [a] and click and drag the object if you wish to translate all objects at once. Note: As there can be no overlap in the ROI or Label overlays, if moving one of these overlays on top of another of same type, cropping will occur. | |
| Click this button and then click in the working area to be able to reshape and/or rotate overlays of a specific type. Press and hold Ctrl and click on the object if you wish to enter the exact dimensions of a square, rectangle, circle or ellipsoid shape. A dialog will open depending on the shape of the object. | |
| Click this button and then click in the working area to be able to delete overlays of a specific type. It is also possible to click-hold-drag to mark a larger area were all objects within are deleted. | |
| Click this button and then click in the working area to be able to copy overlays of a specific type. | |
| Click this button and then click in the working area to be able to paste overlays of a specific type. | |
| Click this button and then click in the working area to be able to change a overlay type to a new overlay type or add a text-note. This is the same function as hovering the mouse cursor over the overlay and pressing the space-key. |
Grow
When assigning overlays to pixels in the image, it is often relevant to define an overlay by clicking on a single pixel and then include neighboring pixels with approximately the same color characteristics. This is referred to as region growing and several different growing methods are available in the Grow page.
How to use the grow function
The way the growing tool is used is to first select the relevant settings for the tool, then click in the working area, hold the Shift- and Ctrl-key down and click on the area that you wish to fill with the given overlay.
Color matching
Color matching grows the overlayed area into adjacent pixels which are not too different in color from the initial pixel.
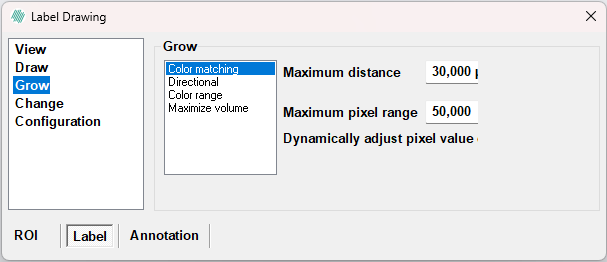
- Use Maximum distance to indicate the radius of a circle within which growing is allowed. This is used to prevent the growing from filling up the entire image.
- Maximum pixel range controls the maximum allowed difference. The difference between two pixels is calculated as the Euclidean distance between the pixels in the color space consisting of all frames and bands in the image. The Euclidean spectral distance is measured as the straight line distance between two pixels values in RGB color coordinate system. - Check the Dynamically adjust...-checkbox to use an average of the current labeled pixels in the current growing, instead of just using the value of the initial pixel. - To apply an Euclidean grow press and hold Ctrl and Shift. Then click left mouse button on the pixel from which you want to grow.
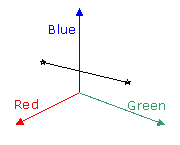
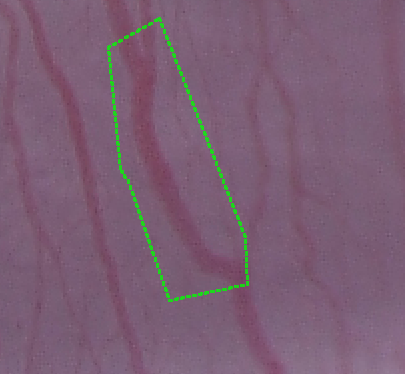
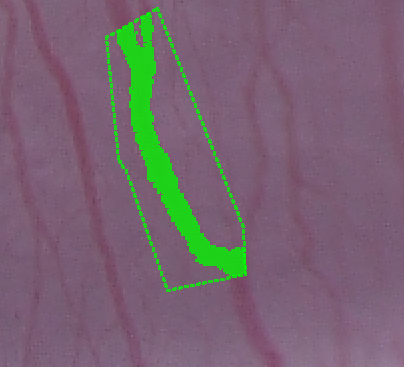
Directional growing
Directional growing is used to extend a connected area of label pixels in a direction specified by the user.
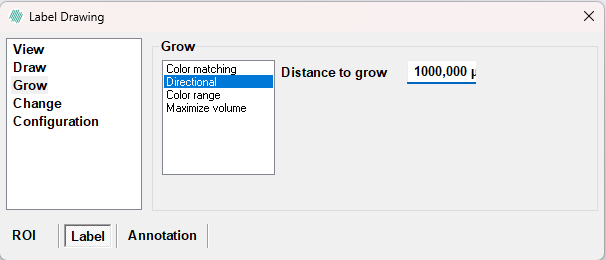
- Use Distance to grow to indicate how far (in pixels or in the current unit) to grow in the specified direction. - To apply a directional grow press and hold Ctrl and Shift. Then press and hold left mouse button near a labeled area in the image and move the mouse in the desired grow direction. Release the mouse button to perform the growing.
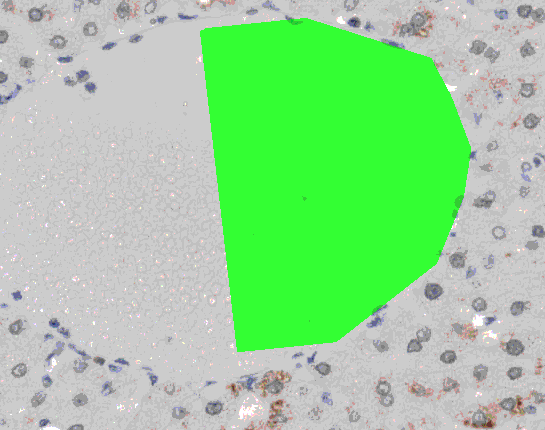
Directional growing (Primate liver tissue, Adipophilin stained)
Color range
Color range is used to grow into all pixels within a specified range of values.
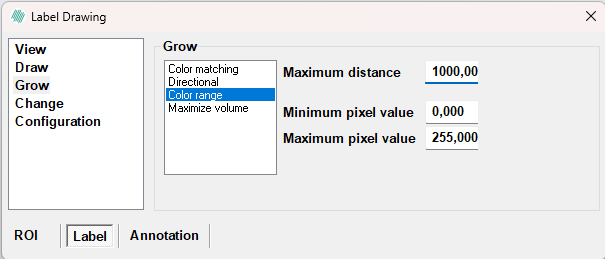
- Use Maximum distance to indicate the radius of a circle within which growing is allowed. This is used to prevent the growing from filling up the entire image.
- Under Minimum/Maximum value, define the allowed pixel values. "200 -> 256" means that the intensity of the pixel (mean value of all bands for a multi-band image) must have a value between 200 and 256 for the growing to fill it.
- To apply a color range grow press and hold Ctrl + Shift. Then left click on the pixel from which you want to grow.
Maximize volume
Maximize volume fills the area which results in the largest ratio between the mean pixel intensity and the label area. This effect fills up well defined dark or bright areas clicked on in the image.
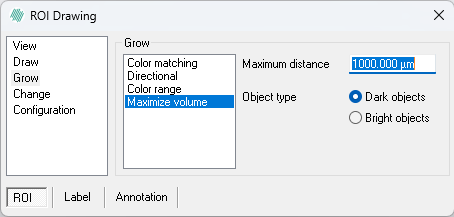
- Use Maximum distance to indicate the radius of a circle within which growing is allowed. This is used to prevent the growing from filling up the entire image.
- Under Object type choose which type of object to grow into. Select Dark objects to fill dark areas or Bright objects to fill bright areas.
- To apply Maximum volume grow press and hold Ctrl and Shift. Then left click on the pixel from which you want to grow.
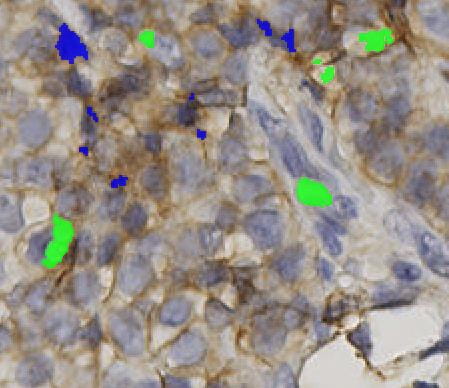
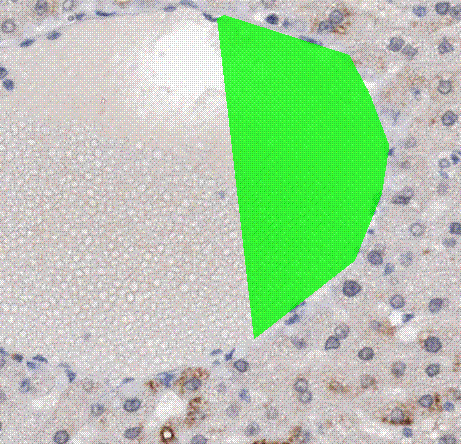
Maximized volume growing (Breast tissue, IHC staining for NHE1)
Change
The Change page allows for changing the overlay values.
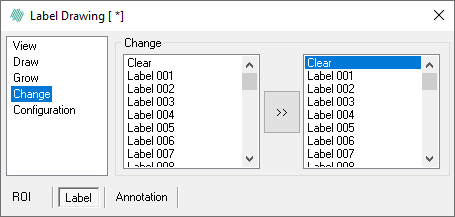
- In the left hand list, specify the overlays to change. Hold down Ctrl while clicking on the overlays to specify multiple overlays. Click on one overlay to select the first overlay, and then hold Shift and click on another to select a range of overlays in the list. Both examples are seen below:
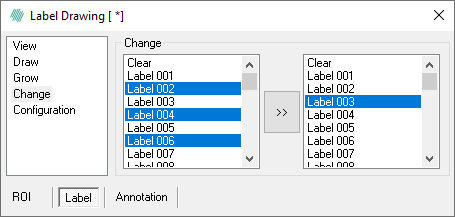
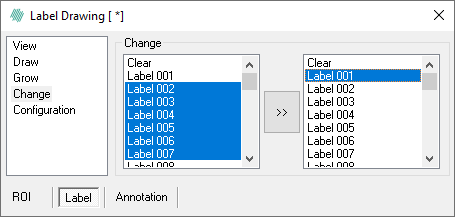
Examples of choosing multiple labels using Ctrl (left) and Shift (right).
- In the right hand list, specify the new overlay value of the left selection.
- Press the arrow button
 to perform the overlay change. All overlays in the image belonging to the selection in the From list (left) are changed to the one label selected in the To list (right).
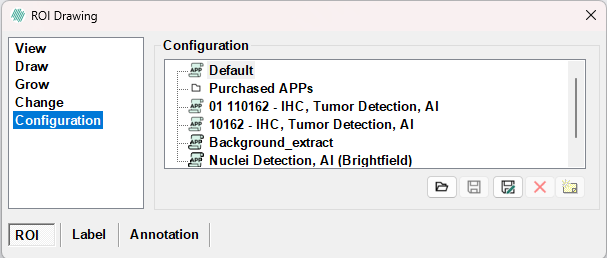
Configuration
In the Configuration page, configurations are handled. The existing configurations are shown in the list, and the currently active is shown in the active field. If the current configuration is not saved a '*' is shown after the name of the configuration in the active field. A configuration holds all of the information which is specified in the overlay dialog.
| Button | Description |
|---|---|
| Click this button to load a selected configuration. | |
| Click this button to save changes to the active configuration. | |
| Click this button to save the active configuration with a new name. | |
| Click this button to delete the active configuration. When a configuration is deleted from within Visiopharm, the configuration files are backed up in Windows Recycle Bin. The files are placed in the root of Recycle Bin. To restore the files, sort Recycle Bin by original location, select all files from a configuration folder, and click "Restore the selected items" to restore. | |
| Click this button to edit information for the active configuration. |